|
St Francis |
|

| Bottom Paint 2023 | Boat Graphics |
| Blister Repair and Barrier Coat | |
| Installing Depth Transducer without Hauling Out | Calculating Underwater Surface Area |
Last updated:
06/23/2024
Future Additions:
Dynaplate
April 9, 2023: I just finished up 3 days of research to find a suitable antifoul paint for our St Francis 44 cat at the Pangkor Marina yard in Malaysia.
There are many paints capable of 1-2 years of antifoul protection, however there are far fewer that can provide what I am looking for:
-
Modern soft ablative
-
Active protection for 3 years or more
-
For use in warm tropical (high fouling) waters
-
Capable of sitting multiple weeks in a marina or anchorage
-
Designed for slow boat speeds (<10 knots)
-
Suitable for fiberglass hulls
-
Locally-available paint
The top choices after my research were:
-
International Micron AP
-
Chugoku Sea GrandPrix 880HS Plus
-
Jotun SeaQuantum Ultra III.
All 3 are the latest generation premium paints, basically equal in anti-fouling capability and with similar characteristics. Technical Data Sheets and additional detailed info available on the company websites describe formulation goals for boat speeds, coverage, application time intervals primers, etc. Be extra careful with company nomenclature for antifoul paints as they are continuously changing and some have similar names but are different generations with very different capabilities.
Common relatively inexpensive cruiser antifoul paints available in SE Asia include International’s Micron Extra 2 and One, Chugoku's 330R and TFA 3, Jotun's SeaForce Active, Hempel Olympic/Globic and a host of others less commonly used. These are the paints that came up when I queried the cruising population. But these generally have lesser fouling protection capability, with shorter haul and movement intervals and some formulated large ships with faster boat speeds. All require proprietary barrier coats, primers and tie coats.
There are various ways to remove old paint including wet and dry sanding, grinding, wet and dry blasting, and liquid paint remover. My preference is for wet blasting which requires careful work and more equipment, but is much faster and provides a better surface for barrier coat/primer adherence.
Proper surface preparation and application technique are critical to good adherence. Brush/roller applications require more coats than spraying due to decreased thickness per average coat, but there is a 15% wastage with spraying. Minimum application thickness should be ensured since soft ablative paints will disappear rapidly if aggressively scrubbed too often. Extra coats, especially at the waterline, leading edges and on the rudder, and soft infrequent scrubbing will help ensure adequate paint is available for the service life of the paint.
Top quality paints are capable of providing maximum protection for slow speed boats, no boat movement for up to 45 days, up to 90 months haul interval, and advanced fouling protection with maximum biocide and slime resistance. Practical Sailor has been testing antifoul paints for many years. The Oct 2015 issue did a test in Sydney, Australia using SE Asia paints where Jotun SeaQuantum Ultra was best. Unfortunately no Chugoku paint was tested.
Current prices in Malaysia for 20ltrs in US$ are:
-
Chugoku 880HS Plus $825
-
Jotun Ultra III $1500
-
International Micron AP $1775
My top choice is currently the Chugoku 880HS Plus, which appears to match the others in antifouling capability but at a much better price point. However, we may be using the International Micron AP as a test boat for the yard. More to come here as the job progresses.
How We Calculated the Underwater Square Footage of Soggy Paws
After first asking other St. Francis 44 owners, and getting no reply. I calculated the underwater hull square footage on our St. Francis 44 catamaran.
-
Using a flexible tape measure, start at the bow and make a mark along the water line every foot moving aft along one side of the boat.
-
Then measure down, perpendicular to the waterline, along the hull to the centerline of the bottom at each 1 foot mark. Record these measurements and the water line mark they came from.
-
Aft, at the beginning of the rudder skeg, where the hull is not uniform, use the tape measure to individually get a close estimate of the rudder, skeg and stern square footage.
-
Lay out the 1-foot marks along the top of a piece of graph paper with one square equalling one square foot. Drop perpendicular lines down from each mark corresponding to your measurments.
-
Connect the bottom ends of the vertical lines. This curved line will correspond to the bottom centerline of the boat.
-
Count the squares and portions of squares. Each square is one square foot. Add the estimates for the rudder, skeg and stern. Quadruple the total so you include both sides of the two hulls.
-
Our total was 549 square feet (51 square meters)
Obviously, it is a lot easier to do this with the boat out of the water.
We just ordered new vinyl lettering for Soggy
Paws online... it was fast, easy, and surprisingly cheap. Our 8" x 53" boat
name in custom font, custom colors, was only $35. We used
Speedy Signs. They
have a really neat 'create your lettering' tool online. You can do simple
boat lettering, or get really creative and use their 'vinyl design tool' and
add graphics.
Interestingly, we wanted to add a little 'graphic' to our name... some cat's
paws. We found if we used their custom graphic tool, and made the boat name
and the paws, it would cost and extra $40. That's a lot of extra
money for 6" of paws. So we broke it up into 2 items... just the text, and
just the graphic. A little more work on our part, but it brought the price
down to $50, only $15 for our "paws".
So if it's time to spruce up your boat and renew your lettering... go for it!
Removing the old vinyl lettering is really easy... a little heat from a hair
dryer, and a little adhesive remover, and a plastic scraper, and you can
have brand new lettering in about an hour.
You don't need a professional to apply the vinyl letters. Speedy Signs has a
pretty clear 'how to' instruction sheet, and will also sell you an
'application kit'. (but you don't need their fancy kit, a little soapy water
works just fine).
We have also, once or twice now, gone to a local sign shop,
which can do the same thing "while you wait" and may even be cheaper than
Speedy Signs.
Lightning Protection
Of all the scary things about cruising and boat ownership, lightning scares me the most. Not only because of the potential for huge repair expenses, but also because of the very real threat of loss of life. It is a serious subject worth careful consideration by anyone using a boat.
For a really good article on the differences between the lightning ground, the radio ground, and the electrical ground, see Stan Honey's great article on Marine Grounding Systems (pdf file).
On our CSY, we had a grounding bar mounted on the hull for lightning protection--see this writeup.
Installing a Depth Transducer While in the Water
On our CSY, as we were getting ready to cross the Pacific, our depth transducer went belly-up. We contemplated hauling out to replace it, but dug into our project box and pulled out a cheap fishfinder we had bought for our dinghy. We managed to mount the included "transom mount" transducer INSIDE the hull. We used this arrangement all the way across the Pacific. And once we bought the catamaran, we had become hooked on having a fishfinder at the helm to help find a good anchoring spot, so we installed another one in the catamaran.
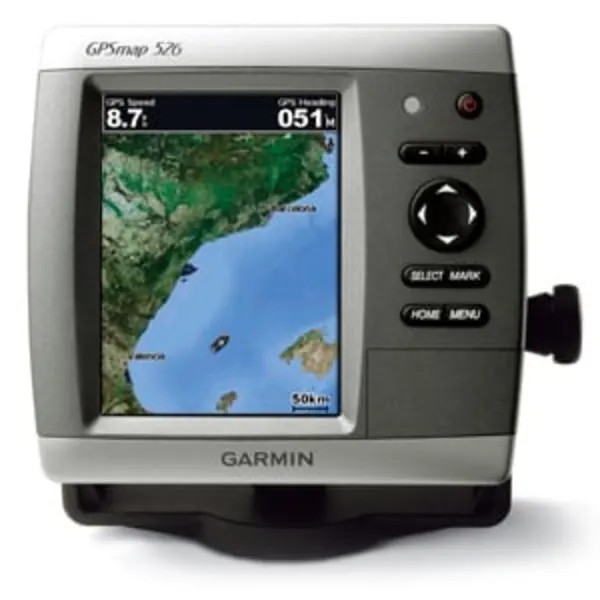
The GPS and chartplotter we inherited with the catamaran was an old Raymarine and was NOT a chartplotter. So we bought a new low-end Garmin Chartplotter Fishfinder 526s ($550 discounted online, with included transducer). It has a 5" color screen and accepts the widely-available Garmin G2 Vision maps. We found it would also use our old chips from the Garmin handheld we'd crossed the Pacific with.
So where to mount the transducer? (See what we did on the monohull here). Just as a quickie trial, we put the transducer just sitting loose in the bottom of the small bilge area of the starboard hull, which is solid fiberglass, allowing the transducer to shoot right through the bottom of our stub keel. (The St. Francis is made of foam-cored fiberglass, but the keel is solid fiberglass).
In this case (unlike the CSY) we still had a working depthsounder mounted not far away, so we could compare depth readings. We found our fishfinder matched the depth readings of our installed through-hull Raymarine depth transducer, AND READS TO A DEEPER DEPTH.
We never have gotten around to drying out that bilge and siliconing the transducer to the bottom of the bilge--it is still just sitting there, 7 years later. Once or twice we have seen screwy readings and had to go turn it back upright in the bilge (a 1 minute operation).
The Garmin is a color chartplotter, and when looking for a good bottom to anchor in, the fishfinder gives pretty good detail, so we can tell whether we are anchoring in mud, grass, coral, or decent sand (9 times out of 10 our interpretation is correct).
Blister Repair and Barrier Coat
We did a full "blister repair" on our CSY 44 monohull sailboat in Ecuador in 2009. See the writeup here.
Thankfully we have only had occasional small blisters in our catamaran, so spot-fixing the blisters is all that was required.
Copyright 2024
WebDesignsInternational