|
CSY |
|

|
Home Page |
||
|
CSY Workshop Home |
||
|
Soggy Paws CSY Home |
||
|
New Cat Workshop Pages |
||
|
Engine |
||
|
Electrical Systems |
||
|
Plumbing
Systems |
||
|
Refrigeration |
||
|
Rig
& Sails |
||
|
Hull |
||
|
Cockpit |
||
|
Deck |
||
|
Interior |
||
|
Steering |
||
|
Electronics |
||
|
Computers |
||
|
Workshop Links |
||
|
Miscellaneous |
||
|
About Us |
||
|
Contact Us |
||
|
About CSY Boats |
||
|
See more 'boat project' discussions by Dave on the CSY Owners Forum |
Last updated:
05/14/2023
Future Additions:
Cutlass Bearing Installation
Bow Eye
Dynaplate
(27 Dec 08 CSYO Post) For starters if you
have time do a search on the Topica site on keel length. There has been some
posts on this subject in the past. The designer, Peter Schmitt told me
personally a year ago that there is very little difference in upwind
performance between the two keels and no stability problems with the short
keel version. I suspect it is more like 5 degrees of leeway more for the
short keel.
There are other advantages/disadvantages which I can post to you later. We
are commencing a circumnavigation now with a short keel tall rig and I have
sailed our boat around the Carib and up and down the Keys many times. We
don't have any problem with our boat's upwind ability especially since we
have a well tuned rig and new sails. I believe that those two things will
make more difference in upwind ability than the 18" of keel length. Of more
concern is where you may cruise in the future and whether or not you can get
into the places you want to.
I have considered "capping the keel" with a plate on the bottom to direct
the water flow along the keel rather than have it fall off the bottom and
cause turbulence drag but haven't gotten around to that yet. 20 years ago I
talked to Ted Brewer about this and he seemed to think that it would be a
worthwhile project on a new shallow draft boat build. I think that it would
help upwind performance some on a CSY.
The shallow draft models from the factory were supposed to have 2000# added
to their keels to offset the weight of the deeper keels. I haven't noticed
any stability problem with our boat, but if you were concerned you could
always add lead, and you would want to do this if you cut off a keel.
(8 May 09 CSYO Post) Re cut keels: according to the CSY manual the concrete
was first poured into the empty keel and then covered by an upper fiberglass
keel bottom 18" up. So, once you identify where the upper keel bottom is, it
is relatively easy to cut the fiberglass just below this around the outer
perimeter of the keel with a circular saw. Since there is no mechanical
connection of the concrete to the fiberglass the lower portion of the keel
will then drop off. From there it is a simple matter to dress up the edges
and paint after applying a barrier coat.
I have heard of several cut keels and seen one done by a friend in Key West.
It was done in a day by just blocking the boat up and cutting a half inch or
so below the upper fiberglass bottom. Since the concrete is not physically
attached to the fiberglass, when the outer fiberglass is cut the fiberglass
encased concrete keel falls off. All cut keels that I know of were done to
44 walkovers. If you are interested in looking at a cut off keel, I believe
that Steve Silverman has one.
To answer your question how to identify a cut keel, I would look for a keel
bottom with sharp edges and maybe no gelcoat on the bottom. Factory keel
bottoms have a thick layer of gel coat and are fairly flat, while a cut keel
bottom might show raw fiberglas, no gel coat and maybe an imbedded concrete
pattern. Also, the loss of keel weight might have been offset by a
knowledgeable owner with additional lead ballast placed in the
bilges-something you could see.
If you are still looking for a project boat you might consider, Pacifico now
in the Rio Dulce for sale at $55K. It was a bit rough and needed work, but
was being used for cruising in the Carib. We were next to them on the Rio at
a marina for a few months a year ago. What boat are you looking at now?
(9 May 09 CSYO Post) We all know that the keel does 3 major things for a
boat underway: improves stability by adding weight below the center of
gravity, provides lift because of its foil shape and improves lateral
resistance because of its surface area. Those are all plusses for a deep
keel. The question is how much of a plus. According to Peter Schmitt, our
designer, when I asked him that question directly, not much. With a little
time someone could probably come up with the calculations to analyze the
differences. And maybe there is someone reading this forum that can provide
an accurate analysis based on actual experience with both hulls. But even
that would be hard to evaluate because of the differences between any two
like boats' sails, rig tuning, bottom condition, etc.
On the negative side are the significant issues of 19" of increased draft
(as you know a real problem getting into the Rio Dulce, and elsewhere),
increased wetted surface area and reduced slippage down a large storm wave.
Regarding the 6'-6" initial draft and more like 6'-10" or better in cruising
trim, there are many places in the southern US, Bahamas, the Carib and even
Ecuador that are a big problem for a boat with that kind of draft.
So there you have it again, tradeoffs and compromises. I still like my tall
rig shoal draft (now more like 5'-3" in cruising trim) for what we are
doing. My gut feeling is that there isn't that much difference in
performance or stability between the two keels to make me look for one or
the other if I was buying a boat. For us the difference in draft is the real
issue.
Cutting a 44's Keel
(26 Oct 09 CSYO Post) The upper lead keel bottom should be almost exactly
18" above the lower concrete bottom, so you should be very close with your
cut.
Based on my research, I believe the loss of draft is about one inch per 1500
pounds removed for a CSY 44 hull. So you will lose just over 3 inches if you
remove 3200 lbs.
But, "not so fast", you will also lose buoyancy by removing 18" of keel. So,
measure and then calculate the cubic volume of the cutoff keel. Next, figure
out the weight of water that that volume would displace (in saltwater 64 lbs
per cubic foot). Finally, subtract that weight from the 3200 lbs and
recalculate, using the 1" draft loss per each 1500 lbs removed.
If you add about 2000# back into the bilge, as CSY said they did for the
shoal keel models in their manual, you will probably come out about where
you started for the waterline. However, if you plan on going cruising
sometime in the future, you will certainly add several thousand pounds of
cruising stuff to the boat. And topsides paint systems like Awlgrip/Imron/Sterling
bubble when they get wet. So you might as well raise the waterline now
rather than later. We are currently up about 4" from our original waterline
and I have eliminated the boot stripe.
Boat Lettering
We just ordered new vinyl lettering for Soggy
Paws online... it was fast, easy, and surprisingly cheap. Our 8" x 53" boat
name in custom font, custom colors, was only $35. We used
Speedy Signs. They
have a really neat 'create your lettering' tool online. You can do simple
boat lettering, or get really creative and use their 'vinyl design tool' and
add graphics.
Interestingly, we wanted to add a little 'graphic' to our name... some cat's
paws. We found if we used their custom graphic tool, and made the boat name
and the paws (as shown below), it would cost $75. That's a lot of extra
money for 6" of paws. So we broke it up into 2 items... just the text, and
just the graphic. A little more work on our part, but it brought the price
down to $50.
So if it's time to spruce up your boat an renew your lettering... go for it!
Removing the old vinyl lettering is really easy... a little heat from a hair
dryer, and a little adhesive remover, and a plastic scraper, and you can
have brand new lettering in about an hour.
You don't need a professional to apply the vinyl letters. Speedy Signs has a
pretty clear 'how to' instruction sheet, and will also sell you an
'application kit'. (but you don't need their fancy kit, a little soapy water
works just fine).
44 Hull Pounds per Inch Immersion
5 Nov 09 CSY Post. For those of you that have the 44 hull and have
been wondering just how much weight/junk you have added to your boat over
the years here's some good news. I recently met Gram, a bright young naval
architect (NA), who used to work with the Pedrick Yacht Design Group but now
is heading out into the Pacific with his family aboard the custom Chuck
Paine 62, Visions of Johanna. I asked him if he could help me figure out
just how much weight I had added to the boat based on raising my waterline 4
inches. He offered to help answer this question.
The term Pounds per Inch Immersion (PPI) is a smaller version of Tons per
Inch Immersion (TPI) used in salvage work to determine how hard a ship is
aground. If you know the TPI for a ship and how far (in inches) out of the
water a ship aground is from its normal afloat condition, you can calculate
how much weight must be removed to float it again. That's not normally our
problem. Determining how much extra weight we have aboard, what the boat
really weighs and where the new waterline should be, is.
So, by looking at a lines drawing of the hull which is on the Hull Layup
Plan, we can determine the distance from the centerline to the hull at each
2' station along the length. By plotting this on graph paper, using a scale
of 1 block equals 1', we can get a pretty close approximation of the outline
of the hull at the design water line (DWL). Then, if we count the squares we
can get the square footage inscribed by the hull outline. Since we all know
that a cubic foot of seawater weighs 64 pounds, a one square foot slice 1"
thick will weigh 1/12 of that, or 5-1/3 pounds. Multiply the square footage
by 5-1/3 pounds and you get PPI, the amount of weight it takes to sink your
boat 1" at the DWL.
Fortunately, we don't have to go through all this because Gram did the
calculation using an Excel spreadsheet and some "secret NA math" and came
out with 1513 pounds. But, if you look carefully at the lines drawing, you
will notice that the hull gets slightly further away from the centerline as
you go up the hull. That means that the further the boat goes down in the
water, the more weight it takes to sink it 1". You will have to do that
calculation yourself.
So there you have it, another little known fact about our great 44s.
Hopefully, it will be of use to someone other than myself.
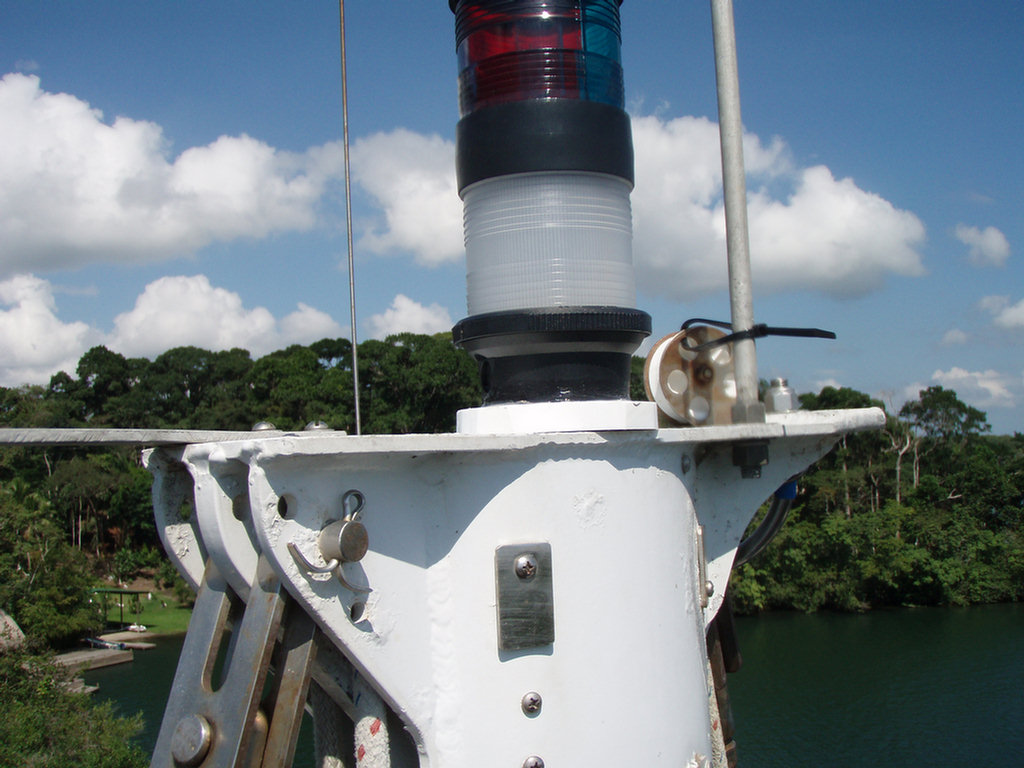
Lightning Grounding Bar
On Soggy Paws, for grounding, we use a 18"x 5/8" mast top aluminum spike connected through the mast and heavy copper wire to a 10'x2"x1/4" copper grounding bar mounted underwater on the hull. The three radios and the tuner all have quick disconnects, but I still have coax grounds to install. We use the oven and microwave as faraday cages for computers/electronics that are out but not permanently installed, and metalized shielding bags for all stored electrical/electronic equipment. So far no problems; I hope it stays that way.
The idea for the copper bar lightning ground came from the ABYC rules for boat lightning protection. Here is a link with a good discussion of lightning protection systems and the ABYC rules from a custom yacht designer dated 2007-09: www.kastenmarine.com/Lightning.htm
Here's what he says (comparing a
12' strip to a 1 sf plate):
"The ABYC suggests the use of a grounding strip, rather than a plate. The
ABYC rule states: 'A grounding strip shall have a minimum thickness of 3/ 16
inch (5 mm), and a minimum width of 3/4 inch (19 mm).' A strip
approximately one inch (25 mm) wide and 12 feet long (3.7 m) has nearly six
times the amount of edge area exposed to the water, which will improve the
dissipation of charges. 'The grounding strip, if used, shall extend from a
point directly below the lightning protection mast, toward the aft end of
the boat, where a direct connection can be made to the boat's engine'.
A grounding plate, if used instead, should be solid, rather than the
sintered bronze type often used as radio grounds. The sponge-like structure
of the sintered bronze plates may, in the event of a strike, allow the
instant formation of steam, which could blow the plate apart, resulting in
possible severe damage to the surrounding hull".
If you have a 4"x6" grounding plate, like a Dynaplate, or similar,
it is meant for use with an insulated backstay and an automatic antenna tuner--to
provide a connection to seawater as a ground plane (not ground) for an HF
radio. As indicated above it should NOT be used as a lightning ground.
My copper bar is thru bolted to the hull on the port side running from about
the forward main cabin bulkhead aft into the engine room. It took me some
time to get the bolt spacing right so I could access them from inside the
boat and not run them into a floor stringer. Two of the 3/8" bolts are
nearly even with the mast so that I could get short runs of 2/0 wire to each
from the mast without much bend. The connections need to be really solid,
so I did the mast thru bolted connections while the mast was out of the boat
12 years ago.
I think the info you often see in lightning literature referring to a plate
is old, and the bar recommendation is more recent. Several universities,
including Florida and Illinois, and others, including NOAA and ABYC, have
done a great deal of recent research on this subject. It is worthwhile
knowing the source and date of info you read, as the recommendations are
changing as new info becomes available. If you Google boat lightning
grounds/protection you will find much more info on this, including this
useful tidbit on Kasten's site:
"The top-most end, or air terminal, should be a sharply pointed spike.
Alternately, a wire 'brush' type terminal can be placed at the masthead,
with the bristles pointed upward. There are several claims that a single
spike is more effective than a brush for dissipating the charge built up by
the boat".
My spike is 5/8" aluminum, about 18" long. I threaded the bottom so I could
bolt it through a web in the mast cap. I also have a short 6" spike I used
when in the Fla Keys running under the 65' bridges. We have the 18" one on
now that we have no bridges to go under.
Of all the scary things about cruising and boat ownership, lightning scares me the most. Not only because of the potential for huge repair expenses, but also because of the very real threat of loss of life. It is a serious subject worth careful consideration by anyone using a boat.
For a really good article on the differences between the lightning ground, the radio ground, and the electrical ground, see Stan Honey's great article on Marine Grounding Systems (pdf file).
|
Copper bar 10'X2"X1/4" |
|
|
|
|
External Sea Strainers
At the advice of several
lobster fishermen in the Keys I got rid of internal basket sea strainers
11 years ago and installed an external screen filter. There are several
types, but all have a removable heavy screen plate with small holes to
allow water, but nothing else of any size, to pass through. The Keys
are terrible for grass getting into standard strainers, and was a real
pain for me to have to dump it often while doing Boy Scout charters
there my first year. Since I changed to the external screen, I have
never seen grass or anything else in my raw water system, and I do check
it periodically.
It might not be a good solution if you have one of those racing CSYs,
but it sure eases my cruising workload. It really is a great help
in screening out floating junk. Anything that it doesn't screen out
will be so small that it will go all the way through your raw water
system without causing a problem (except sand).
They come in several sizes and the biggest fits over both my engine raw
water and refrigeration cooling water thru hulls. So your thru hull
spacing is like mine you may only need one for the two most important
intakes on the boat. The one you want is rectangular, has a slide out
screen plate, and one end is higher than the other.
I bought mine years ago from Lewis Marine in Ft Lauderdale and recently
bought a new screen from them. Here's the source for external raw water
strainers with removable screens: Lewis Marine, Ft Lauderdale, Fl, fig
6826-Hull Intake Strainers w/ Slide Out Removable Screens, Part Nos
2349-2352, spare screens available, Mfg Tournament Marine Products by
Buck Algonquin
Sen-Dure makes one without a removable screen and Groco makes one with
an opening front door and SS screen. I like the Buck Algonquin one
best. They are not cheap but they sure do work well, and you really
only need one to cover the engine and refrig raw water intakes. I am
using round strainers, fig 8561 over the commode and galley SW intakes.
|
|
|

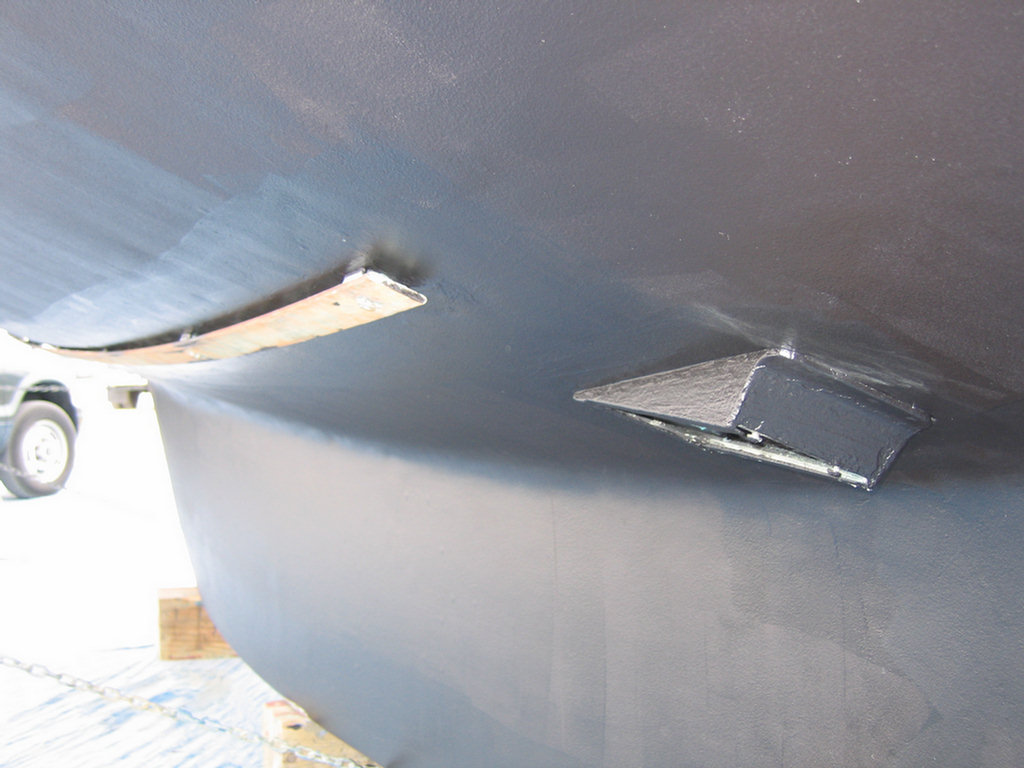
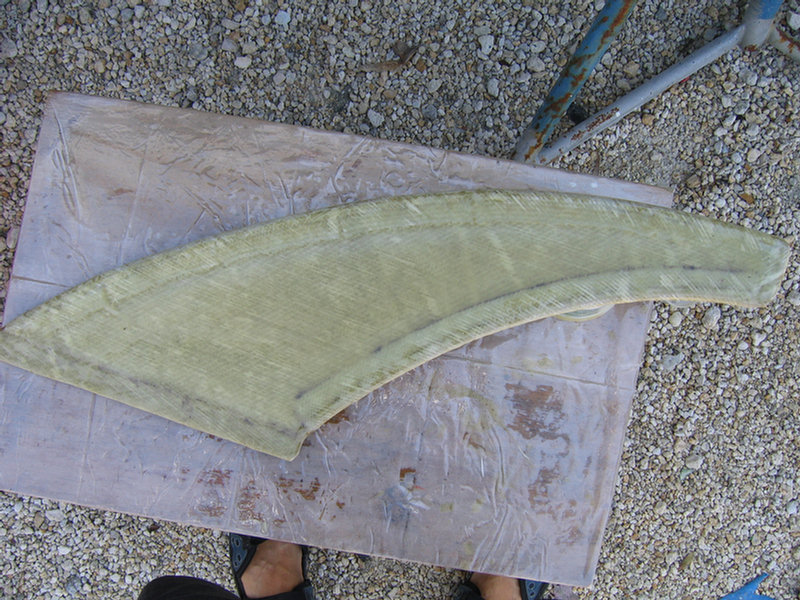
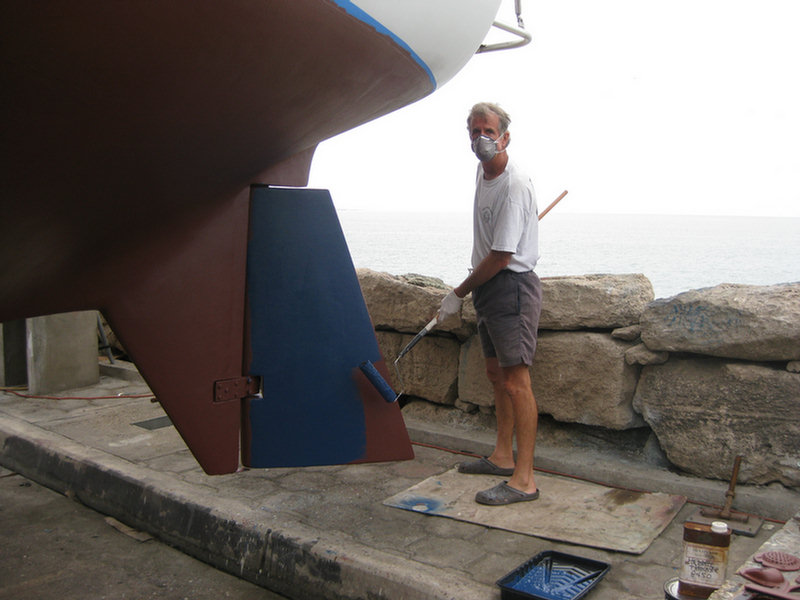
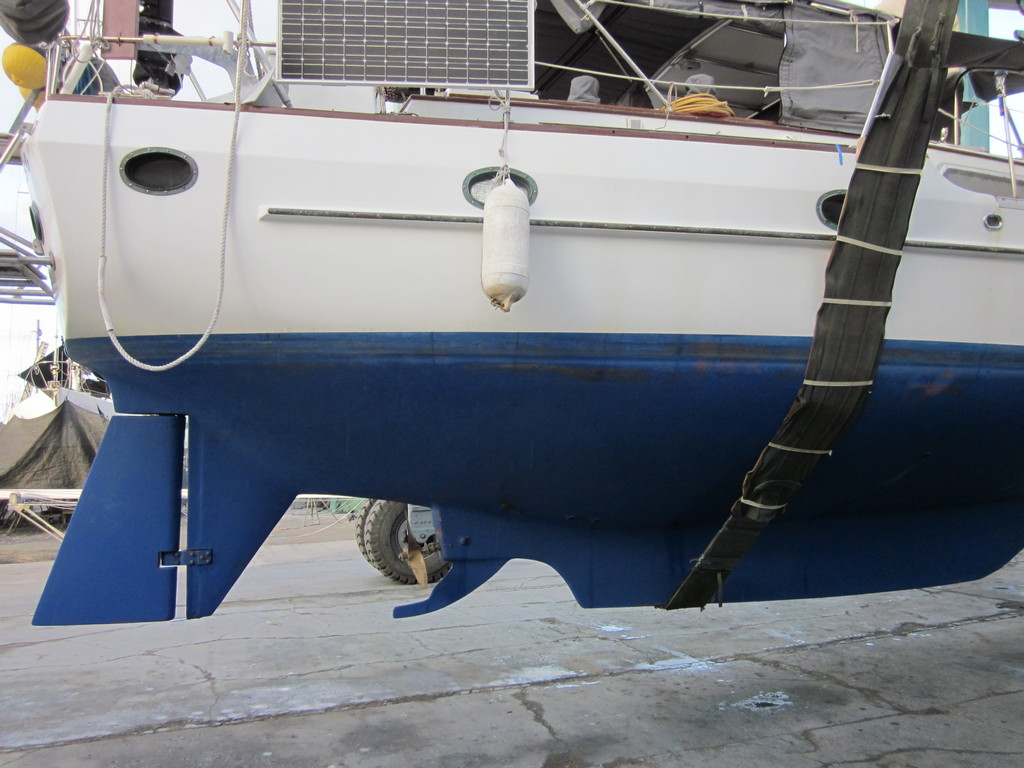
Prop
Guard, Line Cutter, Rudder Guard
While operating in the Florida Keys during lobster
season, fouling trap lines in the unprotected prop is a constant problem.
Dave and Jim Dill of Chilly Pepper designed this fin guard for the
prop after considerable thought and consultation with the commercial
lobstermen. It is heavy enough to handle almost any line but
will still break away without damaging the hull in a heavy grounding.
It is constructed of a 1/2" foam core with one layer of fiberglass cloth on
each side and another layer around the edges. It is firmly
bedded in an epoxy trench cut into the keel stub and then faired with epoxy
and cavasil additive. It does a good job and guides about 75
percent of the trap lines under and away from the prop.
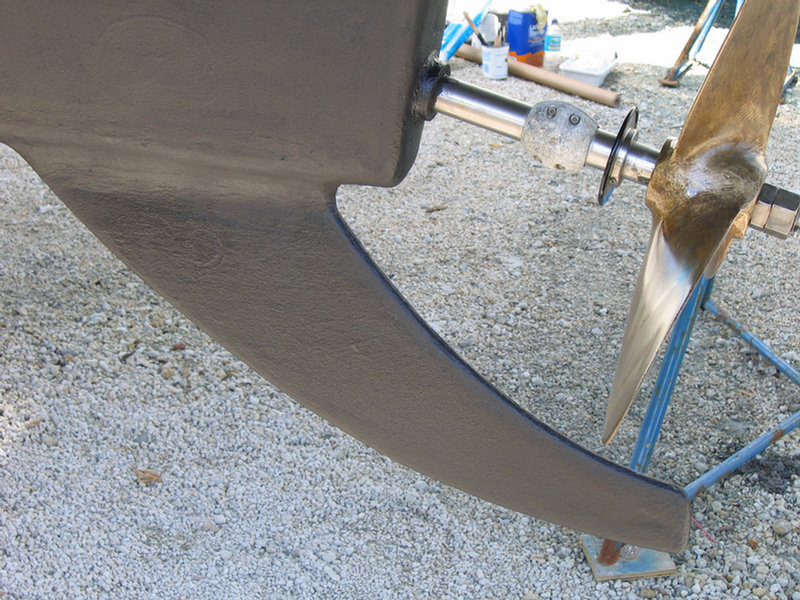
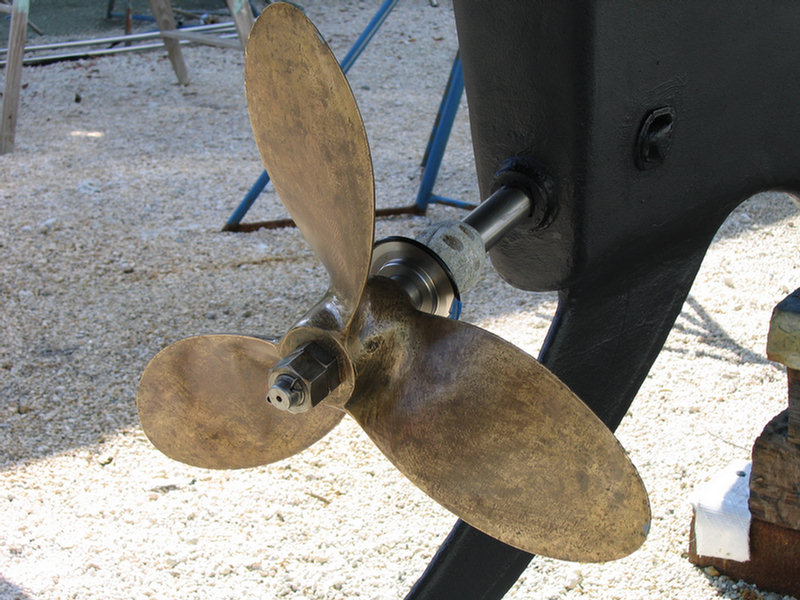
I have also installed a fiberglass tab between the aft end of the skeg and
the forward end of the rudder to prevent a line from getting up into the gap
between them. It is fastened only to the bottom of the skeg with 3
small SS screws. And finally I have installed a line cutter on the
shaft just forward of the prop.
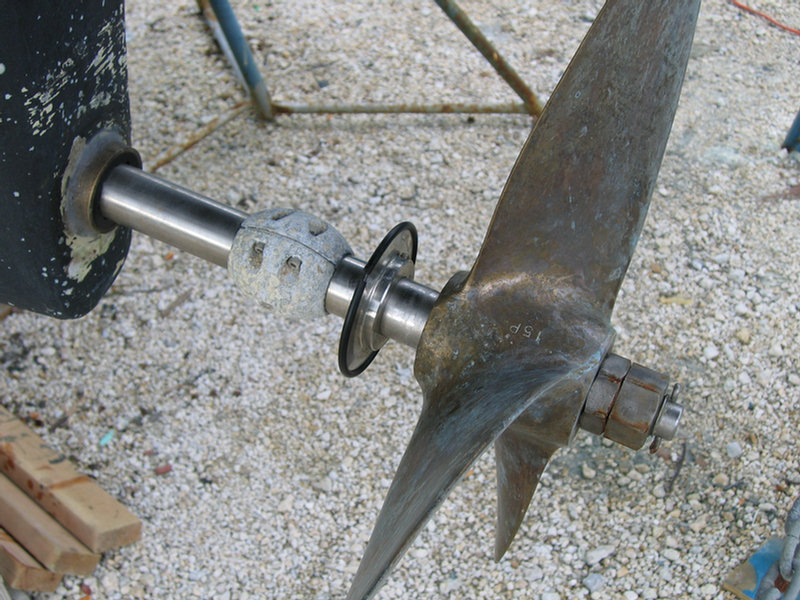
The photos below show the new shaft as it was originally installed in 2005,
with about 10" between the aft end of the cutlass bearing and the forward
end of the prop. Within two years I had to redo the installation
because the extended length of the shaft wallowed out the cutlass bearing as
the prop whipped around. The correct distance should be no more than 4
times the shaft diameter or 6" max. I cut the shaft to allow about 5",
just enough room for the line cutter and the zinc. Now two years later
all is well.
 |
 |
 |
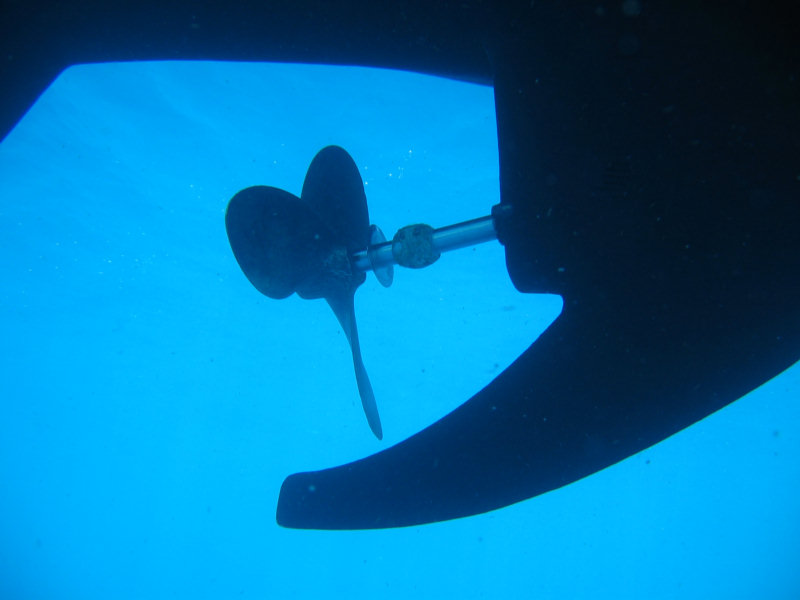 |
 Fiberglass tab between skeg and rudder to prevent line fouling |
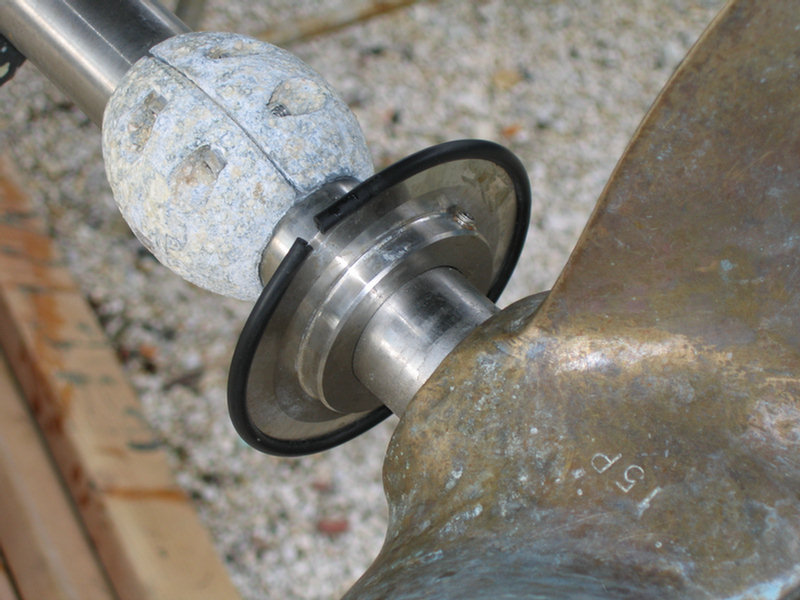 Line cutter with plastic guard on |
 |
 |
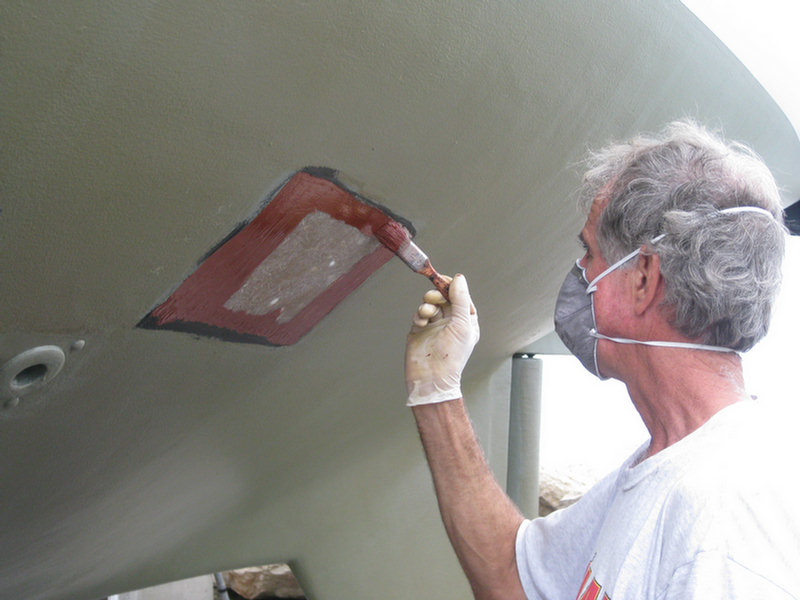
Blister Repair and Barrier Coat
Though the CSYs were constructed before the major issues with underwater blistering occurred (mid-80's, due to a change in the resin), we had experienced a good number of small blisters over the years. We had already done a complete "blister repair" once, using West System epoxy as the barrier coat, but were still seeing blisters in the underwater hull. (It turns out that West Epoxy is so thin, that it is not a very good barrier epoxy unless you put ~20 coats on).
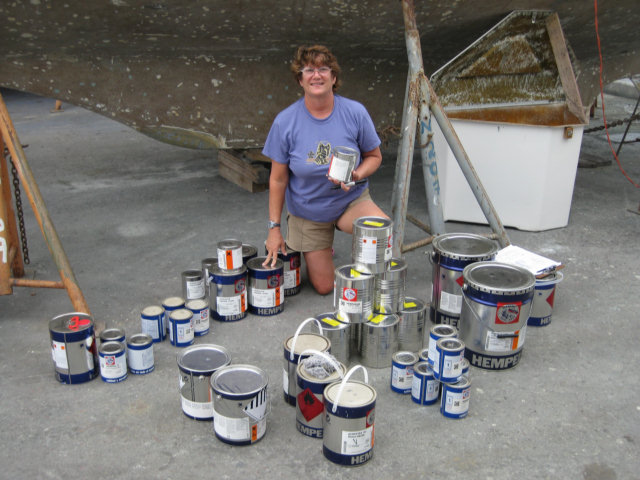
So, while in Ecuador in 2009, with low labor rates, we hauled out, and under the guidance of an expert (George Stewart), did a major blister repair, barrier coat, and bottom job.
We used the Hempel paint system, because that was what was available easily in Ecuador, and also what a friend had used several years before. Here is what we used (prices are in Ecuador, in USD). The Hempel Mastic/Coal Tar Epoxy/Chlorinated Rubber makes a nice thick barrier coat--better than West System, which is a thin epoxy and takes many coats to make an effective barrier coat. Unfortunately, Hempel doesn't really market/sell to yachts in the U.S.
| s/v Soggy Paws Sq Feet: | 578 | 31-August-2009 | |||||||
| Product Name | H# | Colors | # of Coats | SqFt Covg per US Gal | Total Gallons Needed | Total Liters Needed | Liters to Order | Quoted Cost Per Liter | Total Cost |
| Low Vis Epoxy Primer | H15300 | Red / Gray | 2 | 511 | 2.3 | 8.6 | $8.96 | ||
| Base 15309 - Red | 15309 | 50890 | 1 | 1.1 | 4.3 | 10 | $89.55 | ||
| Base 15309 - Gray | 15309 | 12170 | 1 | 1.1 | 4.3 | 10 | $89.55 | ||
| Cure 95040 | 95040 | 2 | 0.5 | 1.7 | |||||
| Thinner 08450 | 8450 | - | 0.1 | 0.4 | |||||
| Mastic | H45880 | Gray | 2 | 154 | 7.5 | 28.4 | 35 | $11.40 | $399.06 |
| Base 45889 - Gray | 45881 | 11480 | 2 | ||||||
| Cure 95880 | 95880 | 2 | 1.9 | 7.1 | |||||
| Thinner 08450 | 8450 | - | 0.4 | 1.4 | |||||
| Coal Tar Epoxy | H35670 | Black | 2 | 185 | 6.2 | 23.7 | 40 | $8.73 | $349.29 |
| Base 35670 - Black | 35670 | 19990 | 1 | 3.1 | 11.8 | ||||
| Cure 98670 | 98670 | 2 | 1.2 | 4.7 | |||||
| Thinner 08450 | 8450 | - | 0.9 | 3.5 | |||||
| Thinner 08450 Total | 8450 | 1.4 | 5.4 | 8 | $6.66 | $53.28 | |||
| Hi Build Chlorinated Rubber | H46330 | Grey | 1 | 211 | 2.7 | 10.4 | 15 | $8.98 | $134.73 |
| 1 Part - Grey | 46330 | 11480 | |||||||
| Thinner 08080 | 8080 | 0.1 | |||||||
| Globic AF | H8190M | Red/Blu/Blk | 4 | 209 | 11.1 | 41.9 | $28.05 | ||
| Color Red | 8190M | 58000 | 2 | 5.5 | 20.9 | 25 | $701.34 | ||
| Color Black | 8190M | 37000? | 2 | 5.5 | 20.9 | 25 | $701.34 | ||
| Thinner 08080 | 8080 | 0.6 | 2.1 | ||||||
| Thinner 08080 Total | 8080 | 0.7 | 2.6 | 4 | $5.61 | $22.44 | |||
| Laquer Thinner | 3.0 | 11.4 | 10 | ||||||
| Subtotal | $2,540.59 | ||||||||
| Liters per Gal | 3.785 | Delivery | $25.00 | ||||||
| Gals per Liter | 0.264 | Subtotal | $2,565.59 | ||||||
| IVA 12% | $304.87 | ||||||||
| Download Spreadsheet | TOTAL | $2,870.46 | |||||||
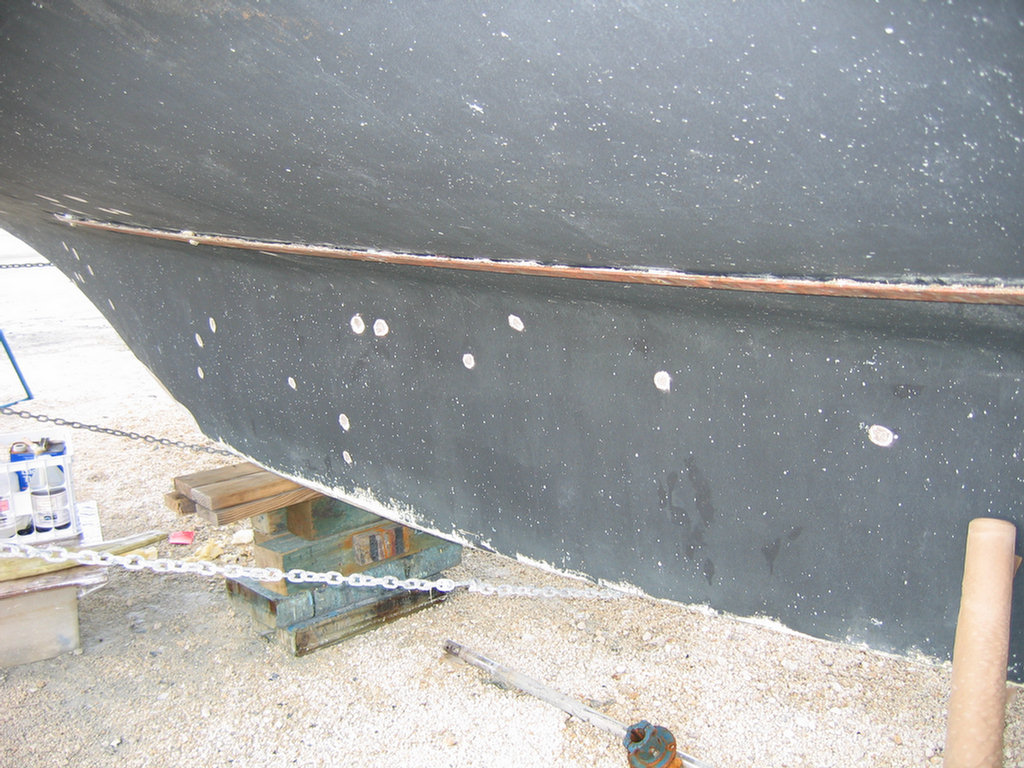
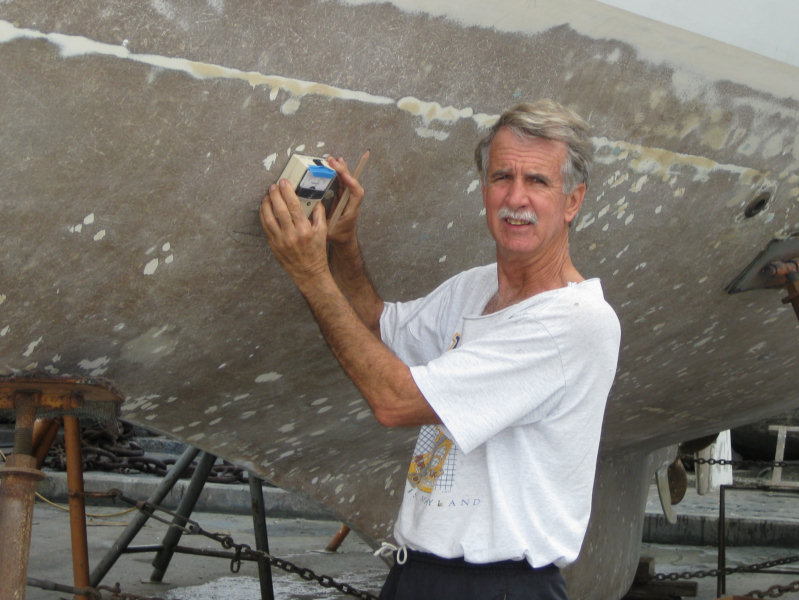
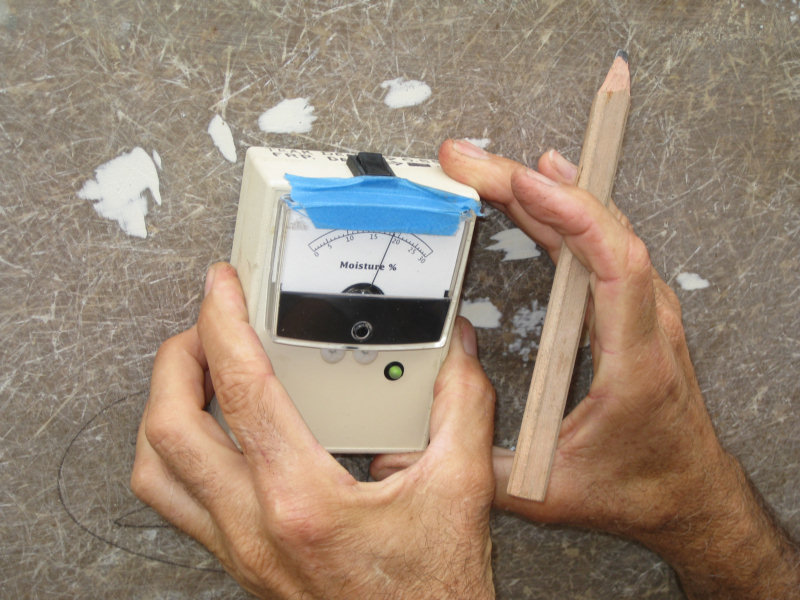
First, we had George's guys use 8" rotary sanders with 36 Grit sandpaper, to sand down to bare fiberglass (including the old barrier coats). Then we tested the moisture level in the hull, in about 75 spots on the hull, and recorded the readings in pencil (with the date) on the hull.
Once the bottom was down to bare, smooth fiberglass, we carefully looked over the hull for blisters. At this point, they are usually weeping moisture. Every blister we saw, we circled in magic marker (as they dry out, they get harder to find). Then the guys carefully took a small grinding tool, and ground out each of the blister spots. For the next few weeks, we washed down all the blisters with fresh water a couple of times a day. This rinses/drains the chemicals left over in the fiberglass that caused the blisters initially.
We let the bare hull dry out for almost 6 months, while we were otherwise occupied with touring in South America. As it was drying, we did periodic moisture testing (monthly at first). After a few months, we repeated the moisture testing weekly--focusing on the "still too wet" spots.
 |
 |
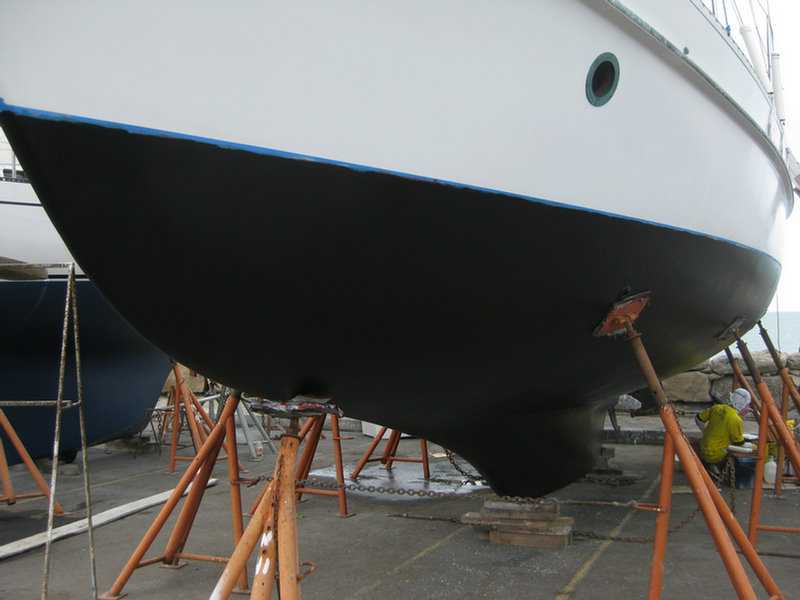
Once the hull was sufficiently dry (the length of time this takes depends a lot on how wet it is to start, and the humidity level where you are drying out), we started the rebuilding process:
First, all the blisters we ground out had to be filled with filler and faired. Then we built the bottom coating back up in this order:
2 coats of Low Viscosity
Epoxy Primer H15309-A thin 2-part epoxy that flows easily and provides a
great bond to the bare fiberglass.
2 coats of Mastic H45881-A very hard and thick epoxy.
2 coats of Coal Tar Epoxy H35670-A thick epoxy with lots of solids.
1 coat of Chlorinated Rubber H46330-A 'tie coat' that allows application of
bottom paint after the epoxies dry.
4 coats of Hempel Globic Bottom Paint H8190M-An ablative copper based bottom
paint (two coats each in 2 colors with lots more coats around the water line
and leading edges).
Thickness of the resulting barrier coat is over 40 mils.

Day 1 - First Coat of Primer Going On |

First Coat of Primer Finished (except the pads) |

Day 2 - 2nd Coat of Primer Going On |

Day 3 (early am) - First Coat of Mastic Going On |

Day 6 - Coal Tar Epoxy Prep |
Day 6 - First Coast of Coal Tar Epoxy Complete |
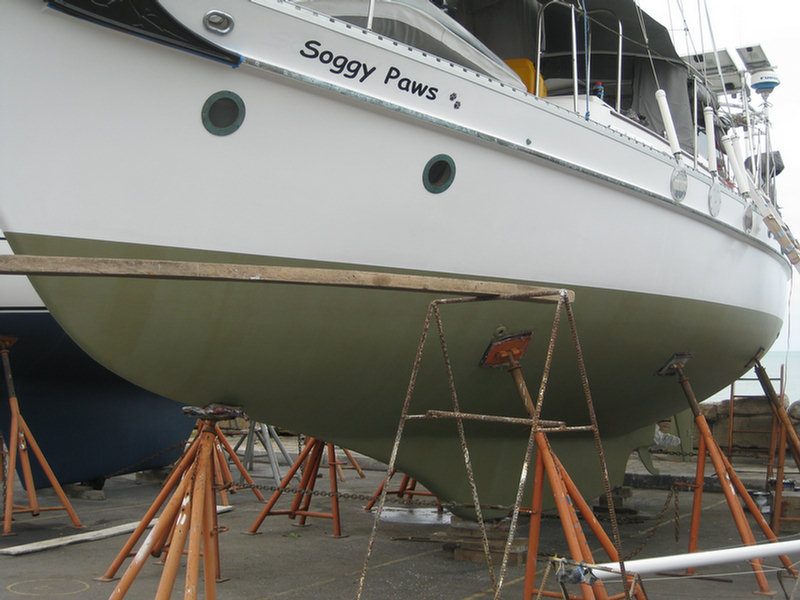
Day 8 - Chlorinated Rubber Completed |
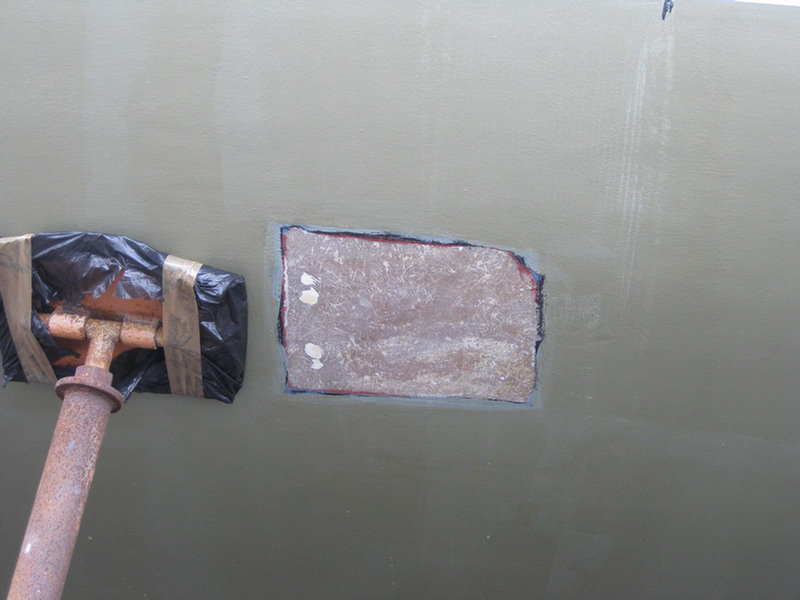
Day 8 - Moving the Pads |
Day 8 - Dave Fills Pad Spots by Hand |
Day 12 - 3rd of 4 coats of Bottom Paint going on |
Finished--beautiful, solid, trouble-free (10 years and counting)! |
|
There are some pretty specific drying and re-coating times in the transition between the Mastic, the Coal Tar Epoxy, and the Chlorinated Rubber. (I don't remember the details, but in one case, one layer had to be applied in a very specific time window, to properly bond and make a tie coat for the bottom paint). Carefully read the Hempel literature, and/or ask your dealer for guidance.
2013 Update: It has been 4 years since we did this, and still not a single blister has come back (unlike the first 2 times I did "blister repair jobs".)
The Hempel bottom paint we originally applied in 2009, and refreshed with an additional coat in our haulout in Hawaii in 2011, had done a good job, but was starting to get thin--we could see the red 'warning coat' starting to show through in quite a few places. And we were getting more growth (however, the growth still removed easily--was mainly soft stuff--virtually no barnacles or clamshells.
So in Feb 2013, unable to get Hempel paint in Fiji, we applied "Blue Water Marine Copper Shield 45" paint (shipped in from U.S.). Practical Sailor gave it a good review as a Budget Buy in their Bottom Paint tests--it was the only inexpensive ablative that lasted pretty well after 24 months. We'll let you know how it holds up in the warm waters of the western Pacific.
How We Calculated the Underwater Square Footage of Soggy Paws
After first asking other
CSY owners, and getting no reply. I calculated the underwater hull
square footage on our CSY 44 shallow draft myself.
The procedure is as follows:
-
Using a flexible tape measure, start at the bow and make a mark along the water line every three feet moving aft along one side of the boat. For us 13 marks.
-
Then measure down, perpendicular to the waterline, along the hull to the centerline of the bottom at each 3' station. Record these measurements and the water line mark they came from.
-
Aft, at the beginning of the rudder skeg, where the hull is not uniform, use the tape measure to individually get a close estimate of the rudder, skeg and stern square footage. These total about 25 sf each side.
-
Lay out the 3' marks along the top of a piece of graph paper with one square equalling one square foot. Drop perpendicular lines down from each mark corresponding to your measurments.
-
Connect the bottom ends of the vertical lines. This curved line will correspond to the bottom centerline of the boat.
-
Count the squares and portions of squares. Each square is one square foot. Add the estimates for the rudder, skeg and stern. Double the total so you include both sides of the boat.
-
Our total was 577 square feet with our waterline raised up about 4". I think the accuracy is within 5 square feet. Note, this is for a SHOAL Draft (5' draft) CSY 44.
Obviously, it is a lot easier to do this with the boat out of the water.
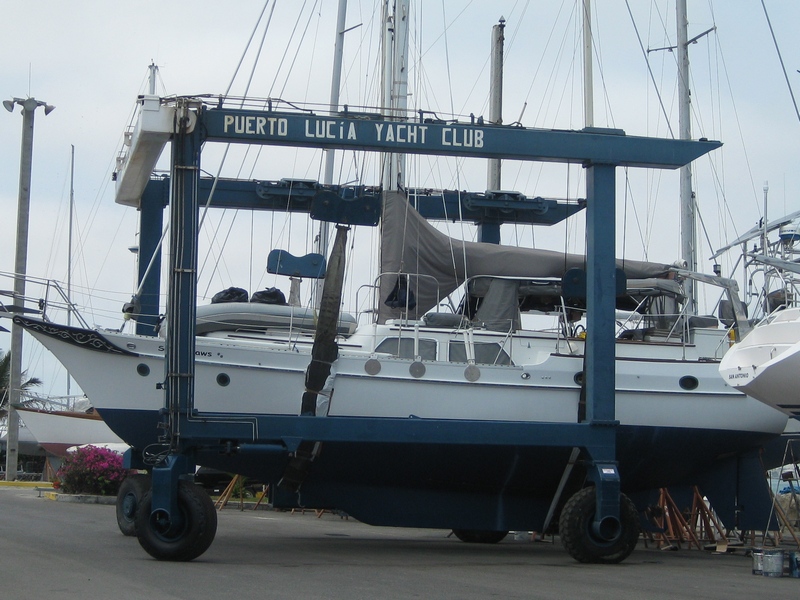
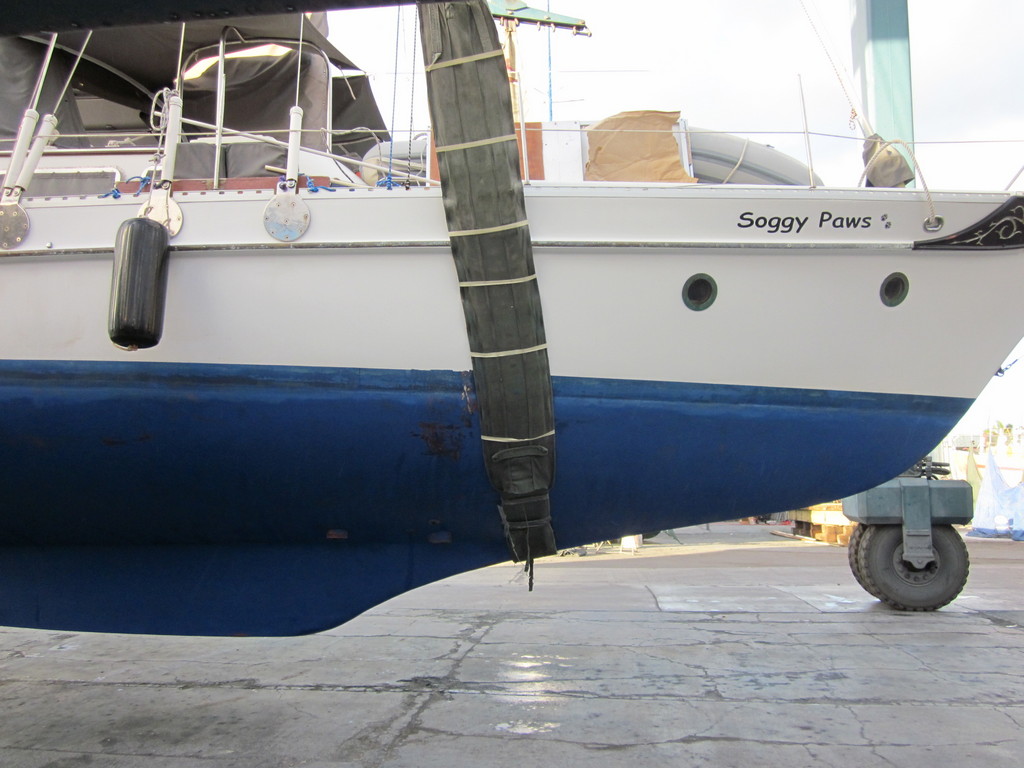
The centerline of the forward strap should be about 1/2 of the distance from the forward lower chainplate to the aft fixed porthole in the hull (the aft porthole of the 2 portholes in the bow).
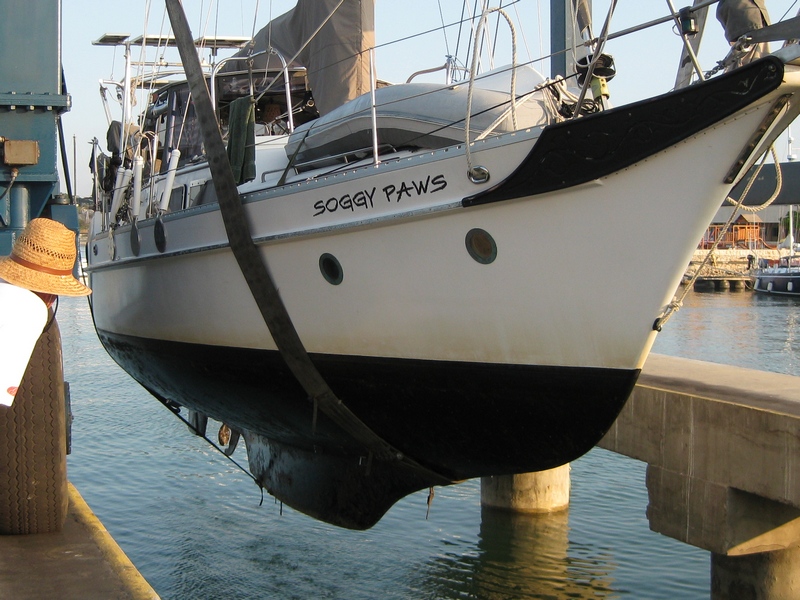
The forward edge of the aft strap should be just on the aft edge of the
first porthole aft of the steps.
Do NOT put the aft strap between the prop and the rudder skeg, because there
is too much sag in the middle of the boat.
Do NOT put it just forward of the prop, behind the keel, because that area
is not strong enough, and might crush or crack the prop shaft stern tube.
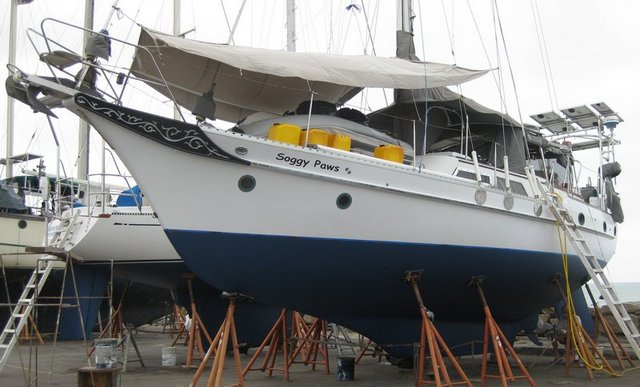
Some additional pictures from our haulout in Hawaii in 2011:
Mounting Emergency Depth Transducer While In the Water
When our old depth sounder failed as we were getting ready to cross the Pacific, we grabbed an inexpensive "fishfinder" out of our projects box and mounted it INSIDE on our big boat, without cutting a hole in the hull.
The unit was a Huminbird Piranhamax 215 that cost us $89 on sale at West Marine in 2009. We bought it for our dinghy, but never got around to installing it, before our big boat sounder died.
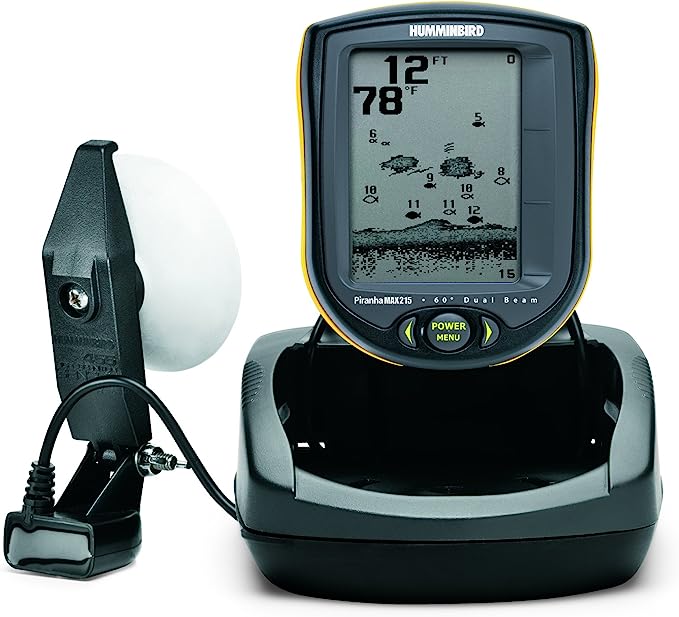
It is what it looks like..A low-end fishfinder with transom mount
sounder. If you want color, add another $50-100. We bought a color one a few
years later, as it helps to show you the texture of the bottom.
To
mount, we used the standard transducer that came in the box, included with
the fishfinder.
We mounted ours in a place where it would go through
solid fiberglass about 1" thick. If your hull is cored, or plywood, it may
or may not work as well as ours does. Ours works to about 300 feet. It also
works well enough through the hull in anchoring depths to be able to see the
bottom profile and get an idea of what's down there (mud, grass, rock,
sand).
We tested it before sticking it down by pressing the bottom of
the transducer right on the inside of the hull where I wanted to mount it,
and see if we got reasonable readings.
The instructions suggested
that it would not work with silicone because of bubbles, and others said to
mount it in epoxy. But I didn't want such a permanent mount--this was only
temporary (5 years ago--ha!). So I used 3M Marine silicone.
I picked
a spot in my engine room (the location where we could reach with the cord
through the porthole in the cockpit). I dry fitted it in the location I
selected, and tested it to make sure it was reading OK. Then I put a big
glob of silicone in the appropriate location and pressed it down hard onto
the hull into the silicone, as level as possible to the bottom. I did mount
it on a portion of the hull that wasn't flat to the bottom, so I levelled it
a little by using a pretty big glob of silicone. But just be careful of
introducing bubbles.
Ours is mounted about 3 feet off centerline and
has about 10-12 degree tilt, outward from the center of the boat. Which, in
the grand scheme of things, isn't much in error, considering we had no depth
sounder at all to start with.
I don't think the cheapie Humminbird has an offset correction, so it is reading conservatively (like 2' less than what's actually there, because it's location on the hull, 2' below the waterline), so a 6" to 1" error caused by the 10 degree tilt isn't much.
We kept this arrangement until we sold the boat in 2015...and have a similar arrangement on our catamaran. We much prefer a fishfinder to a standard depth sounder, as it shows you a lot about the bottom contour as you try to pick a good anchor spot.