|
CSY |
|

|
Home Page |
||
|
CSY Workshop Home |
||
|
Soggy Paws CSY Home |
||
|
New Cat Workshop Pages |
||
|
Engine |
||
|
Electrical Systems |
||
|
Plumbing
Systems |
||
|
Refrigeration |
||
|
Rig
& Sails |
||
|
Hull |
||
|
Cockpit |
||
|
Deck |
||
|
Interior |
||
|
Steering |
||
|
Electronics |
||
|
Computers |
||
|
Workshop Links |
||
|
Miscellaneous |
||
|
About Us |
||
|
Contact Us |
||
|
About CSY Boats |
||
|
See more 'boat project' discussions by Dave on the CSY Owners Forum |
ELECTRONICS
Last Updated: 05/01/2017
Future Additions:
12-19 Volt Step Up Transformer
Handheld Depth Sounder
Soggy Paws has 3 laptop computers aboard, all wifi equipped. However, early on we discovered that the wifi cards built into most laptops are pretty lame. Since email and the internet are a big part of our travel experience, having a better wifi setup seemed to be worth investing some time and money in. There are now several marine-oriented commercial offerings, and Practical Sailor has done several articles testing various configurations.
The ideal setup for the techie, is not necessarily the ideal setup for the average not-too-techie on a boat. If you ask a techie, they will tell you need an antenna at the top of the mast, connected to 'router, a device that will make a little wifi hotspot on your boat. This IS a nice setup because it lets you share a shore-based internet connection with everyone onboard. However, it does take some technical knowledge to install, setup, and use. They cost in the $200-$300 range, maybe even more once you get it installed. They also usually need an external power source (12v or 110v).
The solution we recommend to our friends is a pretty simple setup, is powered off the USB port on your computer, and gives you 95% functionality at half or one third the cost. This also ends up being very portable, so we also take it with us 'on travel'.
Here are some current links and prices on Amazon.com for what we use most of the time:
Alfa AWUS036H 1000mW 1W 802.11b/g/n USB Wifi - $36.00
8.5db Marine Antenna - $27.50
External Antenna Connector Cable - $15.00
10-foot Hi-Speed USB 2.0 Extension Cable - $6.99
In addition, a cheap directional antenna might be useful to figure out where the wifi transmitter is (helps in positioning the boat and/or antenna for best reception).
The EUB-362, our original USB wifi solution, pictured here, is a bit obsolete now. Though it still works, I don't think they ever made Windows 7 Drivers for it.
The Alfa comes in a B/G configuration and a B/G/N configuration. "N" is the latest protocol--faster than G which was faster than B. If you are in the U.S., it might be worth having the "N" version (but make sure it also supports B/G). Outside the U.S. we have rarely ever seen an "N" signal, and our understanding is that an N Alfa doesn't support B/G as well. At the internet speeds we have seen in the South Pacific, there is no point in paying more for N-based devices. The Alfa works fine with Windows 10.
For Mac-ers, a current alternative to the Alfa is the N3. I like the N3 better than the Alfa (very nice packaging), but the Alfa seems to be the 'standard' by which all others are measured. The n3 is only sold/supported by Rokland. It DOES however have USB drivers for the Mac. I keep wondering why it didn't catch on, besides maybe price. It is both Mac and PC compatible, there are Windows 7 drivers available for it, and it also supports some EU-only frequencies. I am not sure there are Windows 10 drivers for the N3, but
Rockland n3 USB Wifi Adapter - $40
If you are on a boat, I wouldn't leave home without AT LEAST the $30-40 USB wifi adaptor, either the Alfa or the n3 are good choices. The antenna and USB extension cable just make it more useable.
With this setup, we hang the antenna in the rigging with a clear line of sight to where we think the wifi signal is coming from. The 6 foot antenna cable allows us to feed the antenna connection through a convenient hatch, so the non-waterproof Alfa is inside out of the weather. Then the long USB cable lets us position our laptop wherever is most convenient at the time.
A great discussion on wifi range issues can be found at WirelessNetworkProducts.com
 Our
Inexpensive HF Radio Solution
Our
Inexpensive HF Radio Solution
We get lots of questions about what kind of SSB we have on Soggy Paws. We get reports all the time about our "great signal", and people ask how many watts we're running.
Well, it's really not about the radio, but more about our installation.
Our radio is a tiny, inexpensive Kenwood TS-50. It was designed as a "mobile" (car) radio. It is about the size of a VHF, and only runs 100 watts of power. You can still find them used in the $300-$500 range. We bought two for less than the price of a new Icom SSB. A similarly priced popular alternative is the Icom-706 MKIIG.
Our antenna is a typical yacht "backstay" antenna, coupled with an SGC-230 antenna coupler. But the magic is in our ground system. Dave read all the advice, and then followed it meticulously. (The advice we followed is Gordon Wests' Seawater Ground System). You don't need miles of copper foil (that's the old way and doesn't work well with today's auto tuners. Here are the components of our system.
1. TS-50 radio at Nav Station, mounted so no water can get to it. (An alternative to the TS-50 is the Icom 706 Mark II G)
2. SGC 230 tuner/coupler located below decks as close to the antenna as possible. Connect the antenna to the stud on the tuner. Though the SGC tuner is designed to be waterproof, it isn't always completely so, and so is better located out of the weather.
3. RG58 coax between radio and tuner, with a T4 Line Isolator inline. The Line Isolator helps strip off interference coming back to the radio receiver from downstream.
4. 16 gauge control wires between radio and tuner
5. 3-inch copper foil from tuner to dynaplate(s) (fastened to hull on outside of boat) and rudder post bolt
6. Tinned GTO 15 wire for your transmission wire from your tuner/coupler to your antenna. It should be less than 10' long and stood off from any other metal 2-4 inches along its entire run. At the antenna connection, loop the end up and then back down before making the connection to keep rain from getting inside the wire. Connect to the antenna using any device that will strongly clamp the bare GTO 15 to the antenna wire. Seal the connection and check it yearly for corrosion. (Source: West Marine)
7. HF ferrites on all radio, and Pactor wires.
8. Ground wire from tuner to radio with capacitors, see Stan Honey's article
Read Stan Honey's article on Grounding and make sure all your grounds comply. But use Gordon West's advice for using a seawater ground for the HF ground. Both articles can be found here.
There are several options for an HF antenna aboard a sailboat.
-
Insulated/split backstay with two insulators--about $400 depending on wire size plus labor if needed. If you are using an isolated backstay for your antenna is needs to be at least 35' long and have insulators both top and bottom. The top insulator should be at least two feet down from the top of the mast in order to provide good separation
-
Separate long wire antenna from mast head to stern rail at aft corner of deck-- about $50 for line and ss wire, install yourself.
-
Whip antenna mounted on the stern deck--probably several hundred dollars but depends on model chosen, install yourself.
We helped a friend rig a 30-foot long wire antenna, using small stainless steel rigging wire, with small loops swaged in the ends. The top end tied to the mast and the bottom end tied to the stern quarter out of the swing of the boom, using high strength small diameter rope. Of course the bottom end needs to also be connected to the tuner.
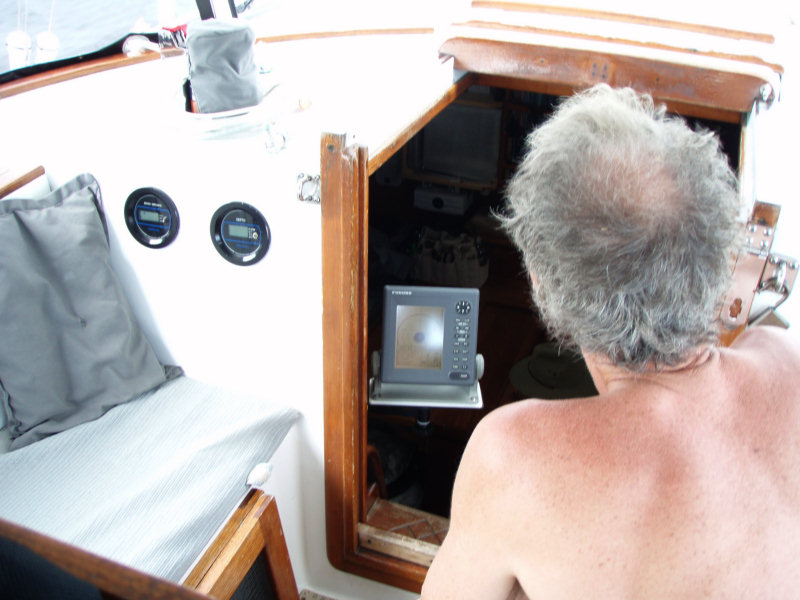 2007) After
going without radar for our Caribbean cruise, I finally broke down and
bought a small Furuno 1622 radar (cost: $550 on sale at West Marine). Now I
don't know how I did without it. Photo here shows the screen mounted
on a small West Marine swing out arm. It stays out of the way, and out of the
sun/weather,
until we need it, and we can also view it from down below in the case of
middle-of-the-night thunderstorms. We find it VERY convenient to be
able to use it in both places, and especially nice not to have to get wet at
night to watch thunderstorms while at anchor.
2007) After
going without radar for our Caribbean cruise, I finally broke down and
bought a small Furuno 1622 radar (cost: $550 on sale at West Marine). Now I
don't know how I did without it. Photo here shows the screen mounted
on a small West Marine swing out arm. It stays out of the way, and out of the
sun/weather,
until we need it, and we can also view it from down below in the case of
middle-of-the-night thunderstorms. We find it VERY convenient to be
able to use it in both places, and especially nice not to have to get wet at
night to watch thunderstorms while at anchor.
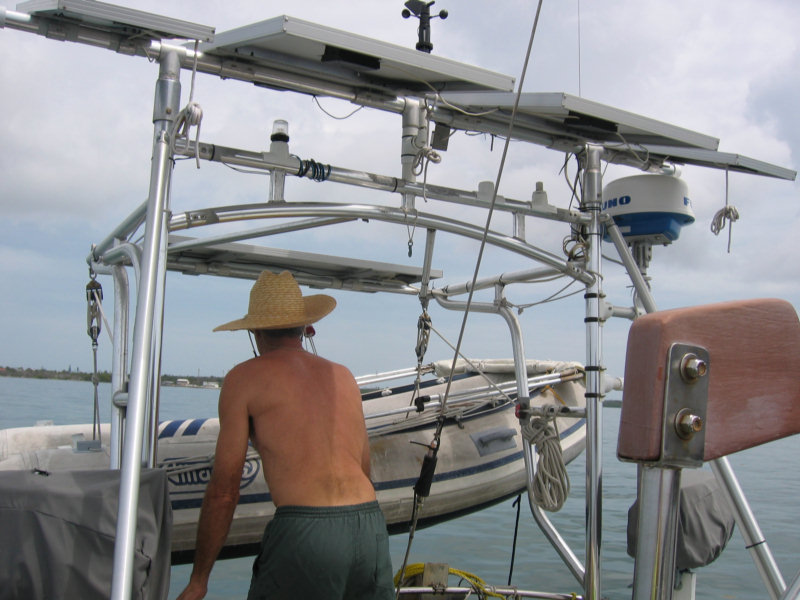 The
radar antenna is mounted on an aluminum plate atop an aluminum pole attached
to our our arch aft. This mounting
system has two positions... down and up. It can be moved from one
position to the other in about 5 minutes with the use of only a screw
driver. In the 'up' position it sits on it's pole mount just above the
solar panels. Here it has a clear view all around but casts
a shadow on the solar panels. So I keep it down whenever they are in
use. It
still does a pretty good job in the down position, although I'm sure we
loose a little distance and probably have a small blind spot to starboard.
The plate is fixed atop the pole so that it can be rotated side to side to
match the boat's angle of heel when we are on passage.
The
radar antenna is mounted on an aluminum plate atop an aluminum pole attached
to our our arch aft. This mounting
system has two positions... down and up. It can be moved from one
position to the other in about 5 minutes with the use of only a screw
driver. In the 'up' position it sits on it's pole mount just above the
solar panels. Here it has a clear view all around but casts
a shadow on the solar panels. So I keep it down whenever they are in
use. It
still does a pretty good job in the down position, although I'm sure we
loose a little distance and probably have a small blind spot to starboard.
The plate is fixed atop the pole so that it can be rotated side to side to
match the boat's angle of heel when we are on passage.
 We
have nearly 100 chart CD's acquired from trading with friends over the
years. We looked at a new color binnacle-mounted chart plotter, but the cost
was pushing a thousand dollars before we had the first chart pack, and
world-wide chart coverage runs in the thousands of dollars.
We
have nearly 100 chart CD's acquired from trading with friends over the
years. We looked at a new color binnacle-mounted chart plotter, but the cost
was pushing a thousand dollars before we had the first chart pack, and
world-wide chart coverage runs in the thousands of dollars.
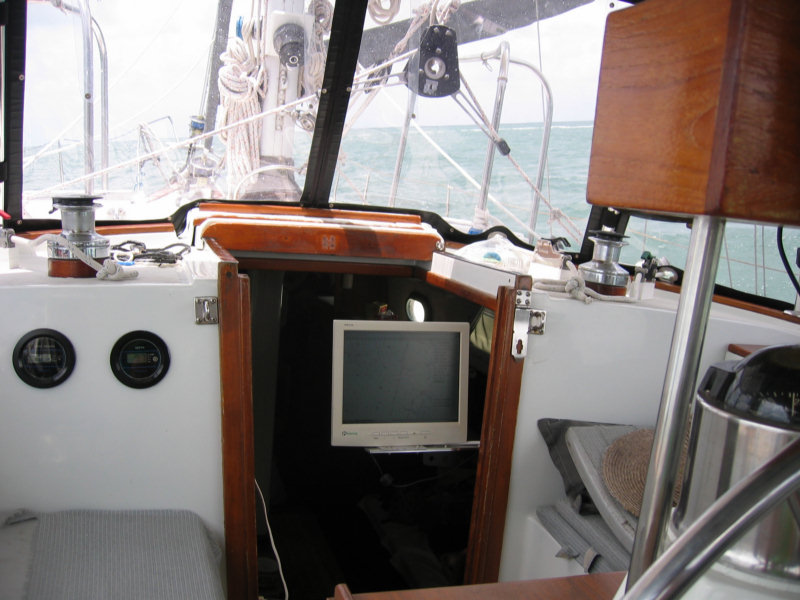
So we put our heads together and designed a very workable system, with the computer
mounted below on the navigation table (velcro'd to the plexiglas tabletop),
and an inexpensive (less than $150) 15" 12 volt LCD monitor (not waterproof,
but we made a cover for messy wx) mounted on a small West Marine swing-out arm
in the companionway.
We
specifically chose an LCD monitor with a 12v-type plug and a brick adaptor.
We cut off the cord at the LCD's 'brick' power adaptor and spliced it into a 12 volt wire
coming directly from the 'GPS' 12 volt circuit breaker panel.
Ours is a Gateway FPD1520. In general, if the monitor has a "brick" inline with the power cord, the output of that brick will be 12v, but check the brick itself to see what the brick is putting out.
We purchased a 12-volt adaptor for the laptop, too. So everything runs directly off 12v.
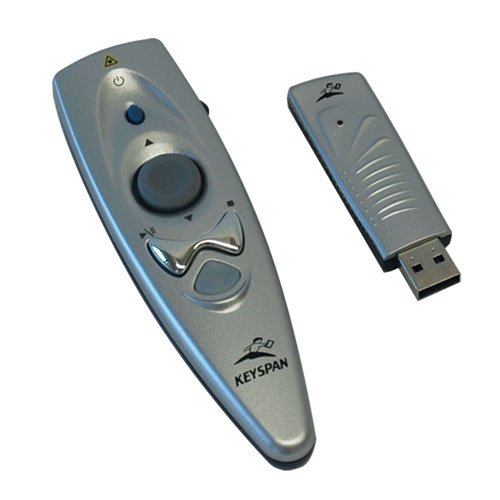
The device that really makes this setup convenient is a 'presentation mouse' that provides mouse capabilities from as far as 15' from the computer, wirelessly. This allows us to control the computer from the cockpit without having to go below. Now the computer is safe and secure on the navigation table down below while we are watching the LCD screen and controlling the computer while on watch in the cockpit. This minimizes the computer's exposure to the elements. I experimented with a few inferior brands before I found the Keyspan Wireless Presentation Mouse (about $40 on Amazon.com)
We often operate with 2-3 different navigation programs running at the same time, as each does a different function better. To facilitate this, we use a piece of commercial software called GPSGate. GPSGate takes the NMEA input from one physical serial port and creates 1 to 4 pseudo-serial ports with the same information. (We use a USB GPS for the GPS signal).
Here are the most common programs that we use:
- OpenCPN - A fully-featured Open Source (free) navigation program for Windows, Linus, and Apple. We used to use Maxsea, but now rarely use Maxsea in favor of the much-less-quirky OpenCPN. This program can use/read many different formats of electronic charts, including the ubiquitous CM93/v2 charts, KAP file charts, and Google Earth charts.
- GE2KAP - A program that allows us (in port) to make raster (Kap) charts from Google Earth
- Sea Clear - Used in the past for scanning in harbor charts from guidebooks (freeware), not being maintained and may not run on newer versions of Windows.
- WXTide32 (free world tides)
- Airmail (email and position reporting via HF/SSB or Iridium/iSatPhone)
The SeaClear Program with Scanned Charlet from Guidebook
See More Computer Navigation Topics in our New Computer Section
Helping Sea Clear Find Your Charts
Updated July 2011: During our winter interlude in Hawaii, and anticipating a lot of open-ocean sailing, we broke down and bought a Class-B AIS transponder. After much agonizing, the unit we bought was the Vesper Marine AIS Watchmate 850, which retails for around $1000 ($1500 with accessories). We opted for the Vesper with the display because the display will allow us to monitor and see our targets WITHOUT having our computer or chartplotter running. And the Vesper unit was designed by a sailor for sailors (lower power consumption than most powerboat oriented units). So far we have not been disappointed in the choice.
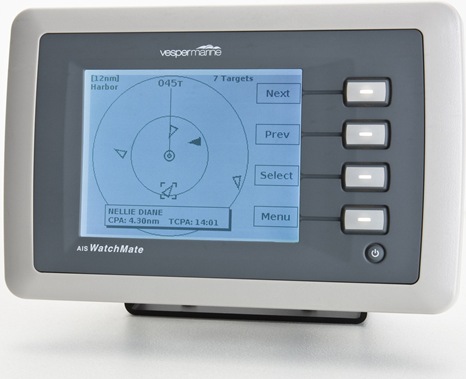
With our normal VHF antenna at the top of the mast, using Vesper's VHF/AIS splitter, we can 'see' ships with Class A AIS up to about 25 miles, and yachts with a Class B transmitter about 5-7 miles away. Having immediate notification that there's a ship in your area is just invaluable, and knowing that he can 'see' you too is even better.
After a heated discussion about cutting another hole in the bulkhead (I wanted the Watchmate mounted in the cockpit), we decided to mount it down below at the nav station. We flush mounted it rather than use the supplied bracket, which is designed for console mount. The flush mount made the internal patch antenna unusable, but we had, as a precaution, bought the external antenna with the unit too. Again after a discussion about where to mount it, we found that mounting the external antenna INSIDE the nav station, worked fine, and solved the issue of where to mount it outside and cable runs, etc. We moved the antenna around until we found a convenient spot where it was getting good reception. So far that has worked fine.
We have hooked it up to our computer using the USB cable and played with it with the Maxsea software (our current charting standard). This works fine, but the only quirk is that OUR vessel shows up as an AIS target on Maxsea as well as other ships. Maxsea (an older version) doesn't seem to have the ability to filter your own vessel from the targets. Since OpenCPN keeps getting better and better, we have almost completely switched to OpenCPN.
Email is an essential part of our nomadic life.
I have (almost) converted Dave from his Yahoo account to using the mailboxes we get as part of our website. Both Dave and I still keep our old Yahoo and AOL accounts and check them occasionally, but our primary email is now using Outlook.
With Outlook and Pop3/SMTP mail mailboxes, we can download our mail in a matter of minutes and then browse our email (and answer it) offline. This is critical in places where we have to borrow or pay for internet access by the hour. It is also important to be able to access old emails while at sea ('what day was so-and-so leaving?')
Also, with our own mail server, we can set up many different email addresses and even add an 'auto-responder' to our mailbox ('sorry we are at sea and will not get your mail until xx/xx/xx').
For our 'at sea' email, we are currently using Winlink and Airmail, the ham email system, as well as Sailmail, for our limited amount of 'commercial traffic'. While at sea, we can check our email and request and receive weather forecasts via HF radio.
Though it costs $250 a year for Sailmail (Winlink is free), Winlink CANNOT be used for 'commercial traffic'. And, in the middle of the Pacific, we have found the Sailmail coverage to be much better than Winlink, so we were really glad we already had Sailmail access set up. (2014 update: Winlink has much better coverage when you get further west toward Australia and SE Asia).
Also, with Sailmail, we can also use the EXTREMELY handy 'Shadowmail' feature, which lets us monitor our shore email while at sea... Shadowmail sends just the email headers... to/from/date/subject, and you can select which messages you want to retrieve and actually read. The original email stays put on the shore mailserver, where we can download it into Outlook when we have normal internet access.
Airmail can also be set up to access your Winlink and Sailmail mailboxes via an Iridium phone. Though we never felt the Iridium was necessary while closer to the great HF coverage in the Americas, in the middle of the Pacific, we have used it frequently for weather access when we couldn't get through on the HF system.
Finally Airmail can also access Winlink and Sailmail via any internet connection, so while you are in port, it's easy to keep using your fast/easy Airmail email.
Cell phones seem to be a fact of life these days in the U.S., and a fantastic way to keep in touch with loved ones while you are cruising. Amazingly, they are also prevalent everywhere in South and Central America now too (and, I suspect, the rest of the world). If you have the right service in the states (Cingular/ATT or T-Mobile), you can roam the world with your phone. It 'only' costs $2-3/minute. Or you can, like most cruisers, buy a new cheap phone in every country, and enjoy local and 'back to the States' calls in the 10-20 cents a minute range.
But, better yet, with a little research and prep, you can just buy one phone and purchase only the 'sim card in each country.' ($5 expense vs $25 expense) and be able to stick with the same phone from country-to-country (in most places).
What you need is:
1. A GSM phone (Cingular/ATT and T-Mobile use GSM in
the States)
2. To get the phone UNLOCKED
3. An understanding of the cell phone frequencies in use in your
cruising area.
There are 4 frequencies in use around the world. To get a phone that works world-wide, you need a 'quad band' cell phone. (Motorola Razr, and the iPhone, for example, are quad band phones).
But if you already have a simple dual-band GSM phone from Cingular or T-Mobile, it is likely that that phone will work everywhere in the Bahamas, the Caribbean, Central America, and parts of South America. (if you go to your home provider's website and look for 'international roaming' and see what countries you can roam in, that will most likely tell you whether your phone will work in that country). However, to use the cheap pay-as-you-go sim in each country, you will need to get your phone 'unlocked'.
Cell phones provided by cell phone providers are 'locked' so that you can't use your phone with other providers.
See our additional notes on using cell phones in Colombia, we have added similar notes specific to cell phone access in the various countries we have visited, on their respective travel pages.
2014 Update: Smartphones and "4G" have complicated the "quad band phone" situation. Unfortunately the "data" frequencies don't seem to be standard, and PHONE that is good around the world may not be good for "4G data" in more than one country/region. My USA Samsung S3, does indicate "4G" in some places in the Philippines, but it's not 4G/LTE. Still learning about this issue... but what I've researched before purchasing another smartphone makes my head hurt. Finally just bought another Samsung S3!
We have found an electronic fax account invaluable. After a little research, and a bad experience with a free account at efax.com, we settled on using Trust Fax as our eFax provider. For only $25/year, we keep an 800 number for inbound faxes, and can send and receive faxes all over the world via email or web interface.
Neiko - Digital Laser Photo Tachometer
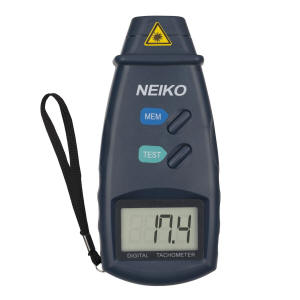 This
little gem was inexpensive and really helpful in checking our engine RPM
versus what our RPM guage was telling us. You put a reflective tab
(supplied) on your rotating item, and then just 'shoot' it with the gun.
It is very accurate. We found a friend's tach that was reading 25%
high! He was just about to get re-propped, because he thought he
wasn't going fast enough for the RPM he was turning.
This
little gem was inexpensive and really helpful in checking our engine RPM
versus what our RPM guage was telling us. You put a reflective tab
(supplied) on your rotating item, and then just 'shoot' it with the gun.
It is very accurate. We found a friend's tach that was reading 25%
high! He was just about to get re-propped, because he thought he
wasn't going fast enough for the RPM he was turning.
We bought ours at Amazon.com (click here).
You can buy a $120 adaptor from the computer manufacturer, or you can buy a really cheap one with a multi-tip arrangement for $15 on eBay. We have found a compromise... custom adaptors from Priority Electronics. These are ordered by computer model number and are well-made. They have a device that boosts the 12v to the 15-19v that today's laptops want for an input voltage.
Precision Electronic Battery Tester
Take the guesswork out of checking your batteries. Battery Tester... Precision Refractometer MISCO REFRACTOMETER TEL: 216-831-1000 FAX: 216-831-1195 WinTV Hauppage HVR-950Q USB TV Receiver for
Laptops
This makes a great package for mobile use--we used it
while driving all over the SE U.S., and it is now our primary navigation
computer backup.
7084VP+ MISCO Glycol & Battery Tester (°F) - Model # 7084VP+ - $135.00
3401 VIRGINIA ROAD
CLEVELAND, OHIO 44122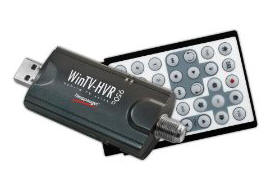 September
2009: We never used the LCD TV that we had onboard, and with the
changeover to digital TV coming up, we sold it at a cruiser's flea market
earlier this year. But while we've been 'on the road', several times we've
wished we had television capabilities. So I researched what might be
available to get TV on my laptop.
September
2009: We never used the LCD TV that we had onboard, and with the
changeover to digital TV coming up, we sold it at a cruiser's flea market
earlier this year. But while we've been 'on the road', several times we've
wished we had television capabilities. So I researched what might be
available to get TV on my laptop.
After doing a bunch of online research, I ordered a
Hauppauge USB WinTV-HVR-950Q. It only costs $70 from Amazon.com. The
package includes the tuner, which is a USB device a little fatter than a
memory stick, a small antenna, a remote control the size of a PCMCIA card,
and a USB extension cord (in case you are trying to squeeze it in with
something else in 2 side-by-side USB slots). Plus a connector to feed an
external video source into your laptop.
Once I got it set up, I was impressed! Sitting at my dining room table on
the ground floor in Satellite Beach, with the supplied mini antenna, I'm
getting about 10 digital channels out of thin air (most from Orlando and
Daytona). You can also hook a cable feed to it, but that's not what I'm
after. It will also pick up old-style analog signals, and I THINK it will do
the European PAL format too (will let you know after we go to Europe).
Not only does it tune TV channels on your laptop, but it can also function
as a DVR (digital recorder), so you can record shows for later playback.
In about 10 minutes, the supplied software had scanned for all available
Analog and Digital channels, and from then, to change channels, you just up
or down arrow on your keyboard. (There's a remote, but I haven't played with
that yet).
It seems to run fine on my Eee 1000 laptop, as long as the signal is strong
enough. It can run full screen or in a smaller window. I've got 3 Internet
Explorer sessions, Outlook, and the Windows Performance Monitor and I'm
using up less than 50% of the CPU.
The software that comes with it (WinTV) is a little klunky, but an update to
Version 7 solved most of the klunkiness.
I'm also tried a 21-day free trial of a $99 software product called
BeyondTV. With an internet interface, it effortlessly provides the
on-screen programming content that we've all become used to with Cable TV
Smart Boxes.
This is a great option for 'road warriors' who want to get local news and
weather on their laptop.
And for a boat or house 'installation', before you go out and spend big
bucks on a hyped 'digital TV antenna and amplifier' (in the $100-$200
range), check out this video on how to build your own TV antenna out of
coathangers. I haven't made one (yet), but it looks like fun and supposedly
does a great job.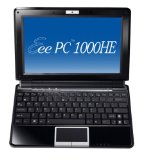 May
2009: I bought a new Eee PC for only $379. The model I got is the
ASUS Eee PC 1000HE 10-Inch Netbook. It is small, great for traveling,
but not too small to be usable as a laptop. It has built-in microphone and
speakers, AND a webcam. So great/easy for doing Skype on the road. AND it
has an 8 hour battery, for those long bus/airplane rides, and a really solid
case, necessary for the abuse that my laptops take. This model comes
with XP.
May
2009: I bought a new Eee PC for only $379. The model I got is the
ASUS Eee PC 1000HE 10-Inch Netbook. It is small, great for traveling,
but not too small to be usable as a laptop. It has built-in microphone and
speakers, AND a webcam. So great/easy for doing Skype on the road. AND it
has an 8 hour battery, for those long bus/airplane rides, and a really solid
case, necessary for the abuse that my laptops take. This model comes
with XP.
It doesn't come with a CD/DVD, so you have to buy that extra. I bought a
Samsung from Amazon for about $49 that will run totally off the USB,
without having to plug it into external power.
I also bought a copy of
Microsoft Streets and Trips 2009 and a cute little
USB GPS. Though Streets and Trips has a version that comes with a GPS, I
chose to get an alternative GPS because the reviews on its receiver were
much better than the MSoft one.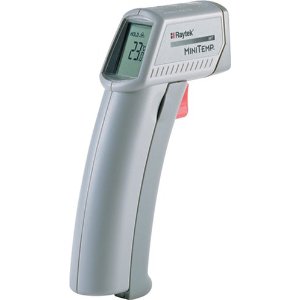 We
use our
Raytek Mini Temp Non-Contact Digital Thermometer Gun all the time
onboard. It is useful in the kitchen (checking the temp of your yeast
water, to make sure you don't kill your yeast while baking), in our
refrigeration toolkit, and in our engine toolkit. With this little
hand-held device, you 'shoot' any surface you want to take the temperature
of, and it immediately indicates the surface temp of whatever you are aiming
at.
We
use our
Raytek Mini Temp Non-Contact Digital Thermometer Gun all the time
onboard. It is useful in the kitchen (checking the temp of your yeast
water, to make sure you don't kill your yeast while baking), in our
refrigeration toolkit, and in our engine toolkit. With this little
hand-held device, you 'shoot' any surface you want to take the temperature
of, and it immediately indicates the surface temp of whatever you are aiming
at.
When we left Florida, instead of the traditional digital depth sounder, we had an inexpensive B/W Fishfinder installed on Soggy Paws' helm. It does a decent job of being a digital depth sounder, but the fishfinder screen also enables us to 'see' the bottom profile... we can tell if the bottom is rocky, and sometimes can tell if it is soft mud or good sand (takes some experience in reading the screen to do this). Ours was a very inexpensive (~$150) Raymarine unit.
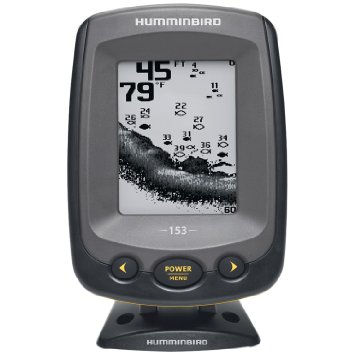 When our 10-year-old Raymarine started acting wonky, we
did a temporary install of a very inexpensive ($89) Humminbird fish finder we had
bought for installation in the dinghy. Setting it up for our dinghy
hadn't made its way to the top of our "to do" list--it was still
sitting in our "projects" box in the originally packaging. So Dave did a
"temporary" install at our helm station to get us through the cruising
season with a working depth sounder. We literally had it taped to
console in the cockpit for about 6 months.
When our 10-year-old Raymarine started acting wonky, we
did a temporary install of a very inexpensive ($89) Humminbird fish finder we had
bought for installation in the dinghy. Setting it up for our dinghy
hadn't made its way to the top of our "to do" list--it was still
sitting in our "projects" box in the originally packaging. So Dave did a
"temporary" install at our helm station to get us through the cruising
season with a working depth sounder. We literally had it taped to
console in the cockpit for about 6 months.
This worked so well that we have now finished the install and left it as our primary depthsounder, and bought a second one for the dinghy. It's now sitting in our "projects" box waiting for being set up for the dinghy.
Here is what Dave emailed to a friend who was trying to do the same thing, about our "temporary" (now permanent) installation:
We mounted ours transducer inside the hull, in a place where it would go through solid
fiberglass about 1" thick. If your hull is cored, or plywood, it may or may
not work as well as ours does. Ours works to about 300 feet. It also works
well enough through the hull in anchoring depths to be able to see the
bottom profile and get an idea of what's down there (mud, grass, rock,
sand).
We tested it in this location before sticking it down by pressing the bottom of the
transducer right on the inside of the hull where I wanted to mount it, and
see if we got reasonable readings.
The instructions suggested that it would not work with silicone because of
bubbles, and they wanted me to mount it in epoxy. But I didn't want such a
permanent mount--this was only temporary (3 years ago--ha!). So I just used 3M
Marine silicone.
I picked a spot in my engine room (the location where we could reach with
display at the helm and the standard length cord routed through the porthole
to the engine room, in the cockpit). Ours is mounted about 3 feet
off centerline, NOT exactly leveled with the bottom, and NOT
attached to any supporting things. It was installed with a liberal goop of
silicone and pressed flat onto the fiberglass inside the hull, in the engine
room. You just need to make sure your goop of silicone doesn't end up
with any air bubbles in it.
We estimate that the transducer has a 10-12 degree tilt, outward from the
center of the boat. Which, in the grand scheme of things, isn't much in
depth error, considering we had no depth sounder at all to start with. The cheapie Humminbird has an offset correction, so it is reading
conservatively (like 2' less than what's actually there, because it's
location on the hull is about 2' below the waterline), so the 6-12-inch error
in depth reading
caused by the 10 degree tilt isn't much.
Even if you get a little tilt, the error is pretty small. At the time, we
were going from no depth sounder at all, so a foot or two of known error (in
shallow water) was no big deal.
We did this temporary arrangement in 2011, I think, and 3 years later, it is still our primary depth sounder. Even if you already have a satisfactory depth sounder, it is well worth having one of these onboard as a backup, in case your primary quits working. And we really think the fish finder is a much better depthsounder for cruising--you know much more about the bottom you are traveling over. (we turn off the distracting "fish" symbols). The 2014 price of the low end units is about $120 now.
See what we bought on Amazon.com
Other friends did the same thing with a low-end Garmin fish finder.
Our planned installation in the dinghy will be to put a motorcycle battery and the display in a water-resistant box, and mount the transducer on a bracket on the stern of our inflatable. The trandsducer is removable from the whole bracket, so the whole thing comes out of the dinghy easily when we're not using it. And we recharge the motorcycle battery on board the big boat. A friend had this setup and it worked great for diving and gunkholing.
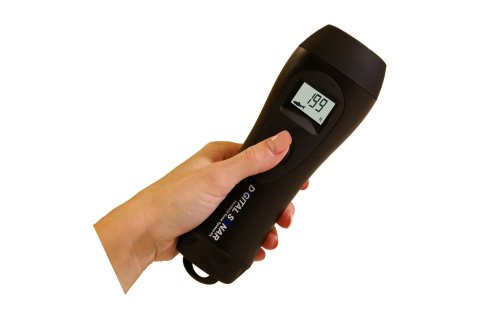 Until
we get the Humminbird set up for the dinghy, we currently use a hand-held depth sounder for gunkholing
around in the dinghy, and for diving.
Until
we get the Humminbird set up for the dinghy, we currently use a hand-held depth sounder for gunkholing
around in the dinghy, and for diving.
Also on Amazon.com